Setup
Get up and running in minutes
Connect your Tesla account, set your location, and configure your solar arrays and tariffs for accurate live data, forecasting, and cost tracking.
Connect to Tesla
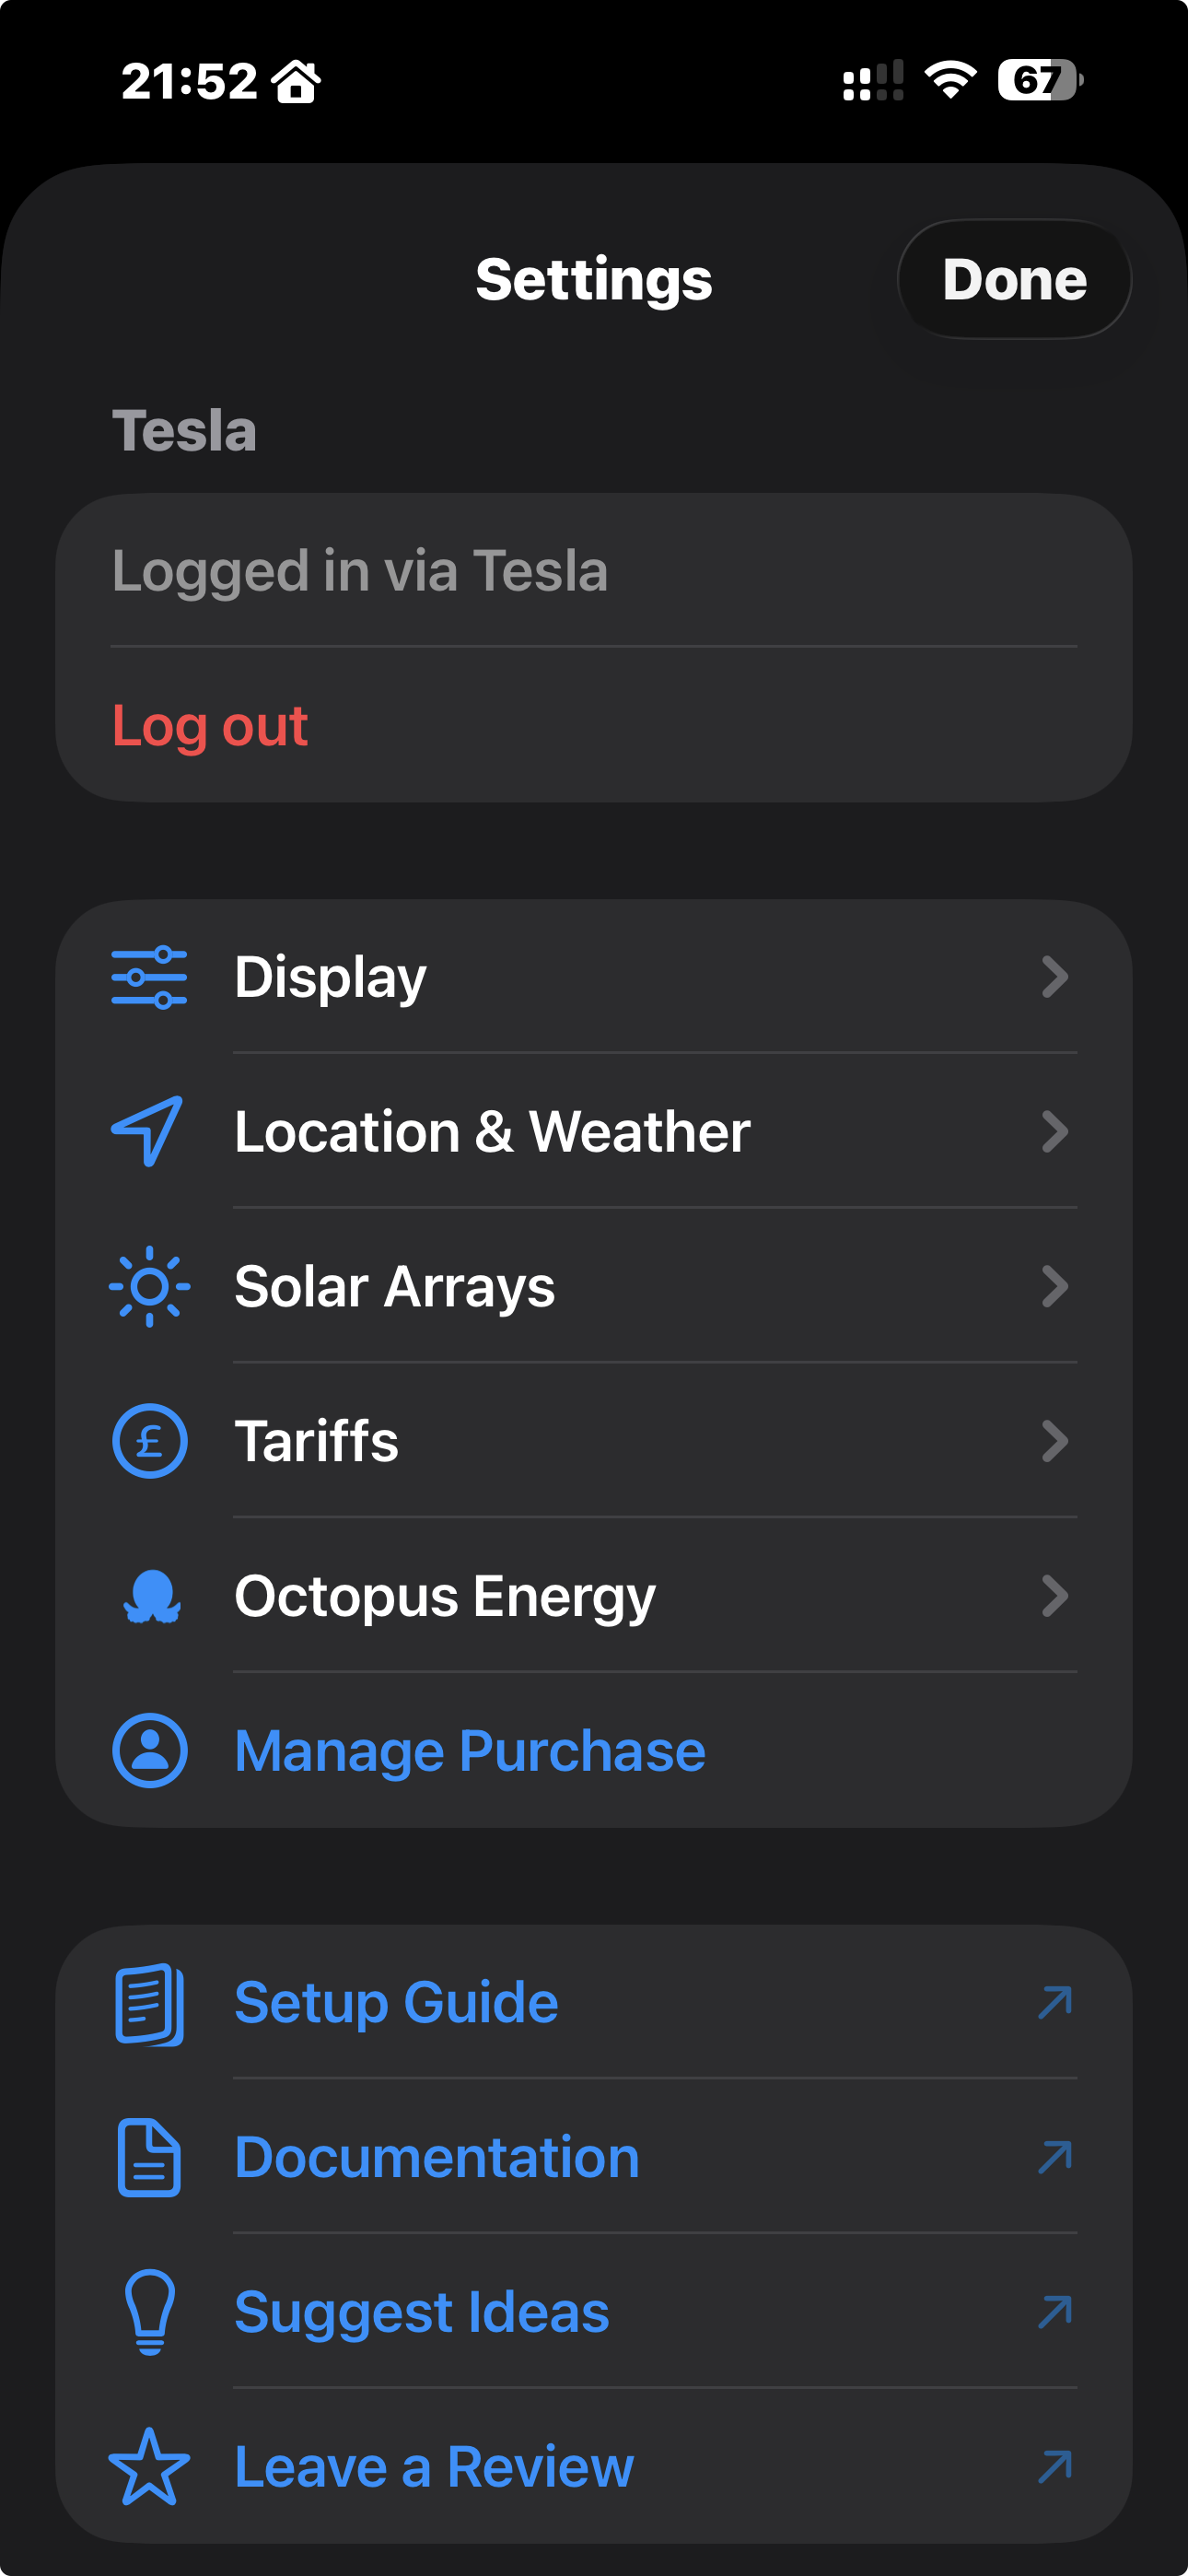
- Open the app and tap the gear icon to open Settings
- Tap "Login with Tesla" to open the secure in-app browser
- Sign in with your Tesla account and approve read-only access to your energy site
- Once connected, Settings shows "Logged in via Tesla". You can log out at any time
- If there is more than one energy site in your Tesla account then you will need to select the one you want to monitor
- Note that Zap Panels does not store your Tesla credentials
- Tap Save or Get Started to return to the dashboard
Display
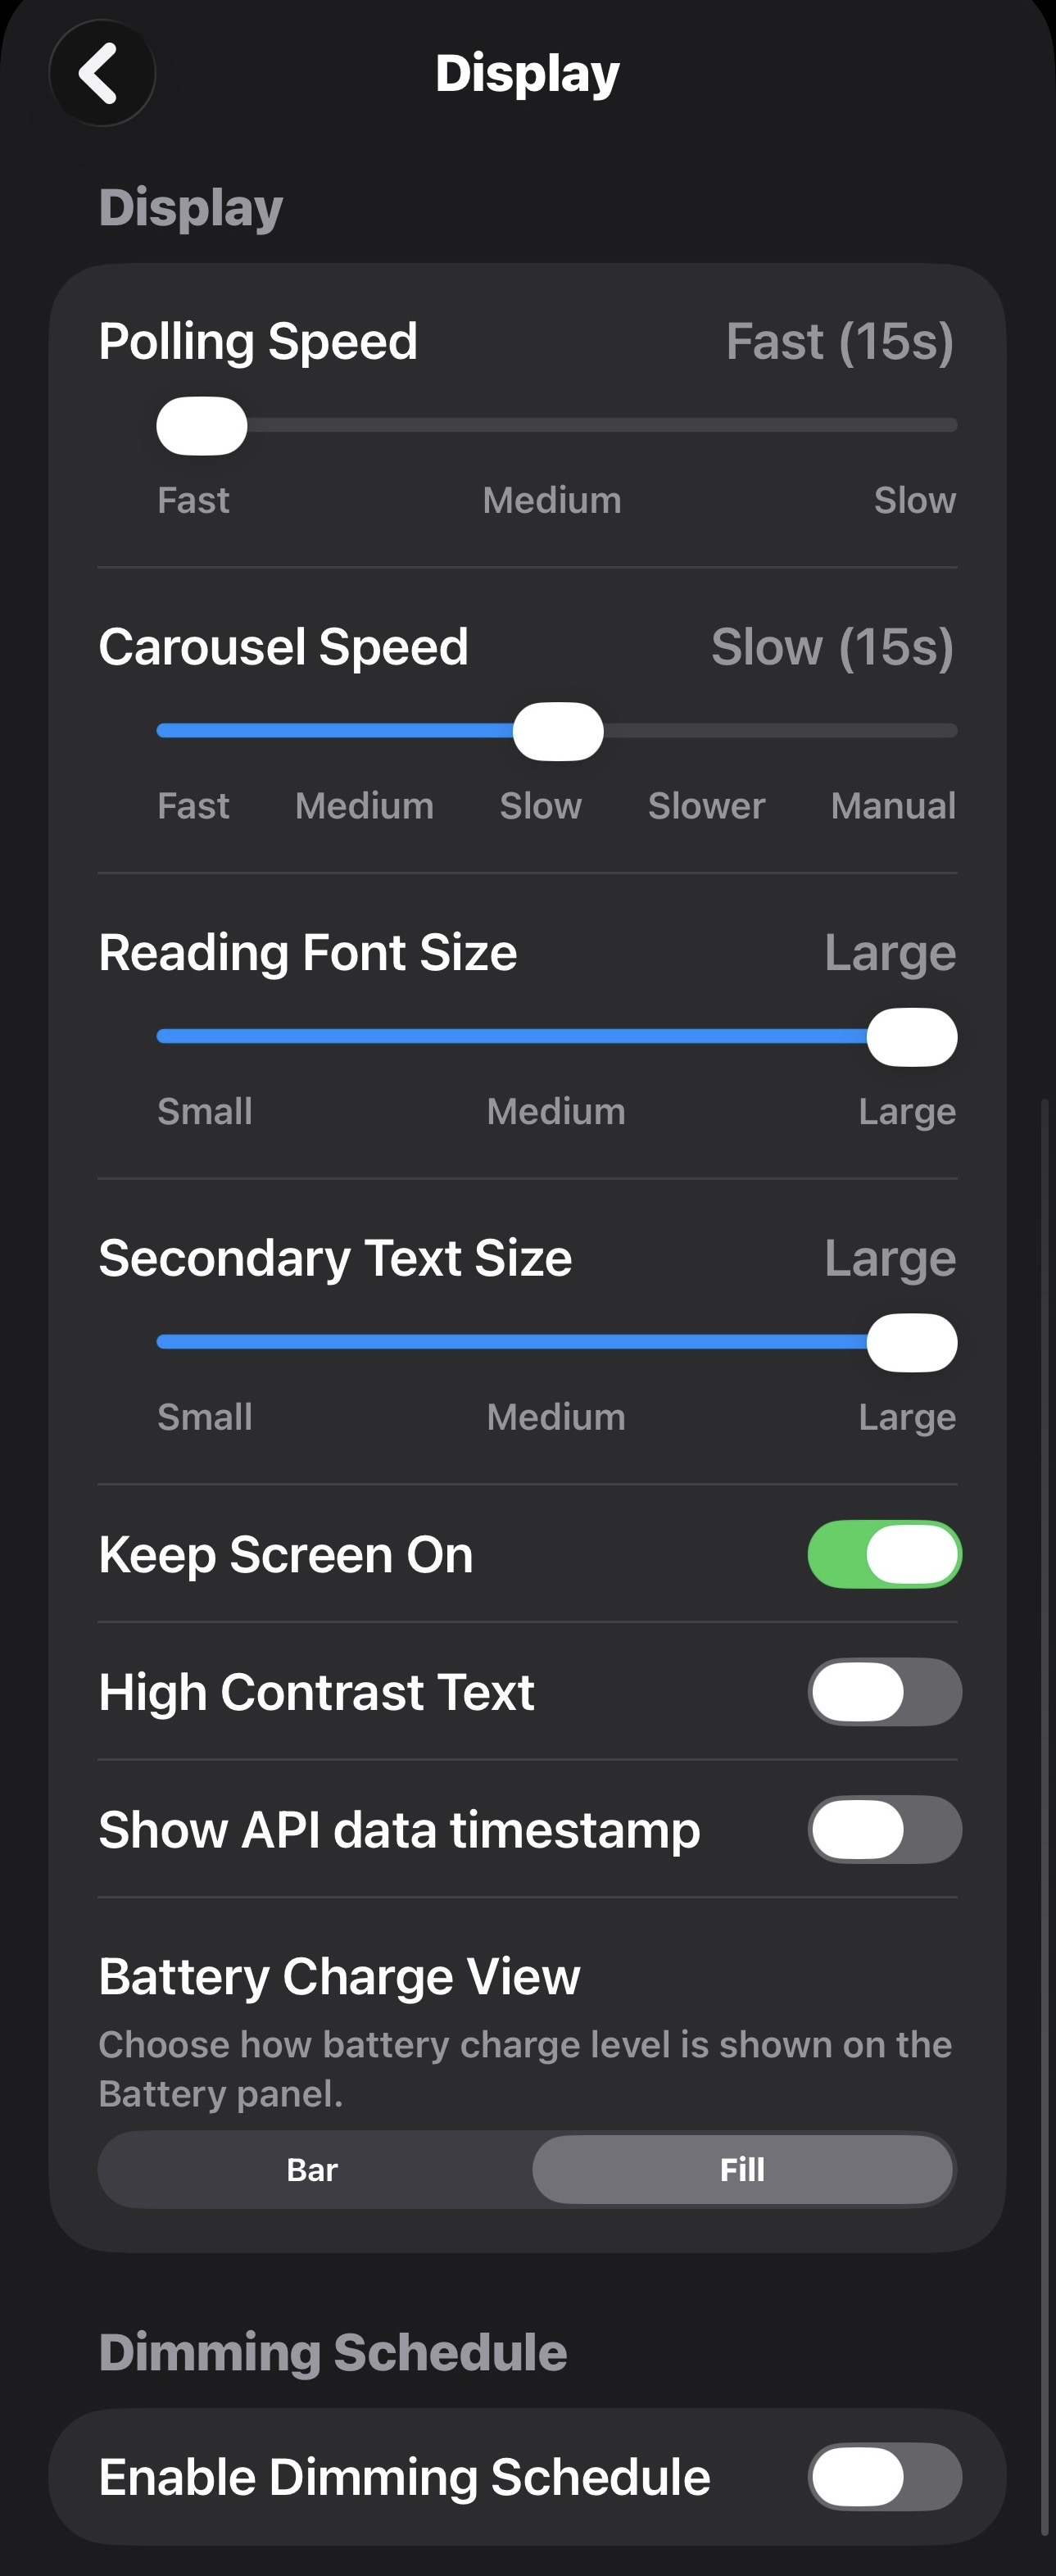
- Polling Speed controls how often live data refreshes: Fast (15s), Medium (30s), or Slow (60s)
- Carousel Speed sets how quickly the solar and grid panels cycle between views automatically, or set to Manual to advance with a tap on the panels
- Reading Font Size and Secondary Text Size let you scale the dashboard text for your display
- Keep Screen On prevents your device from sleeping while the app is open, useful on a dedicated display
- High Contrast Text increases the brightness of secondary text and labels on the dashboard, helpful in bright environments or if you find the default muted tones hard to read
- Show API data timestamp displays the time of the most recent Tesla API call on the dashboard, so you can see how fresh the data is
- Battery Charge View chooses how the Battery panel shows state of charge: Bar draws a horizontal bar within the panel, while Fill uses the whole panel as a charge indicator, which is easier to read from a distance
- Dimming Schedule works with Keep Screen On: enable it to set two separate periods each day when the screen dims to a level you choose, for example overnight or when nobody is around to view it
Location & Weather
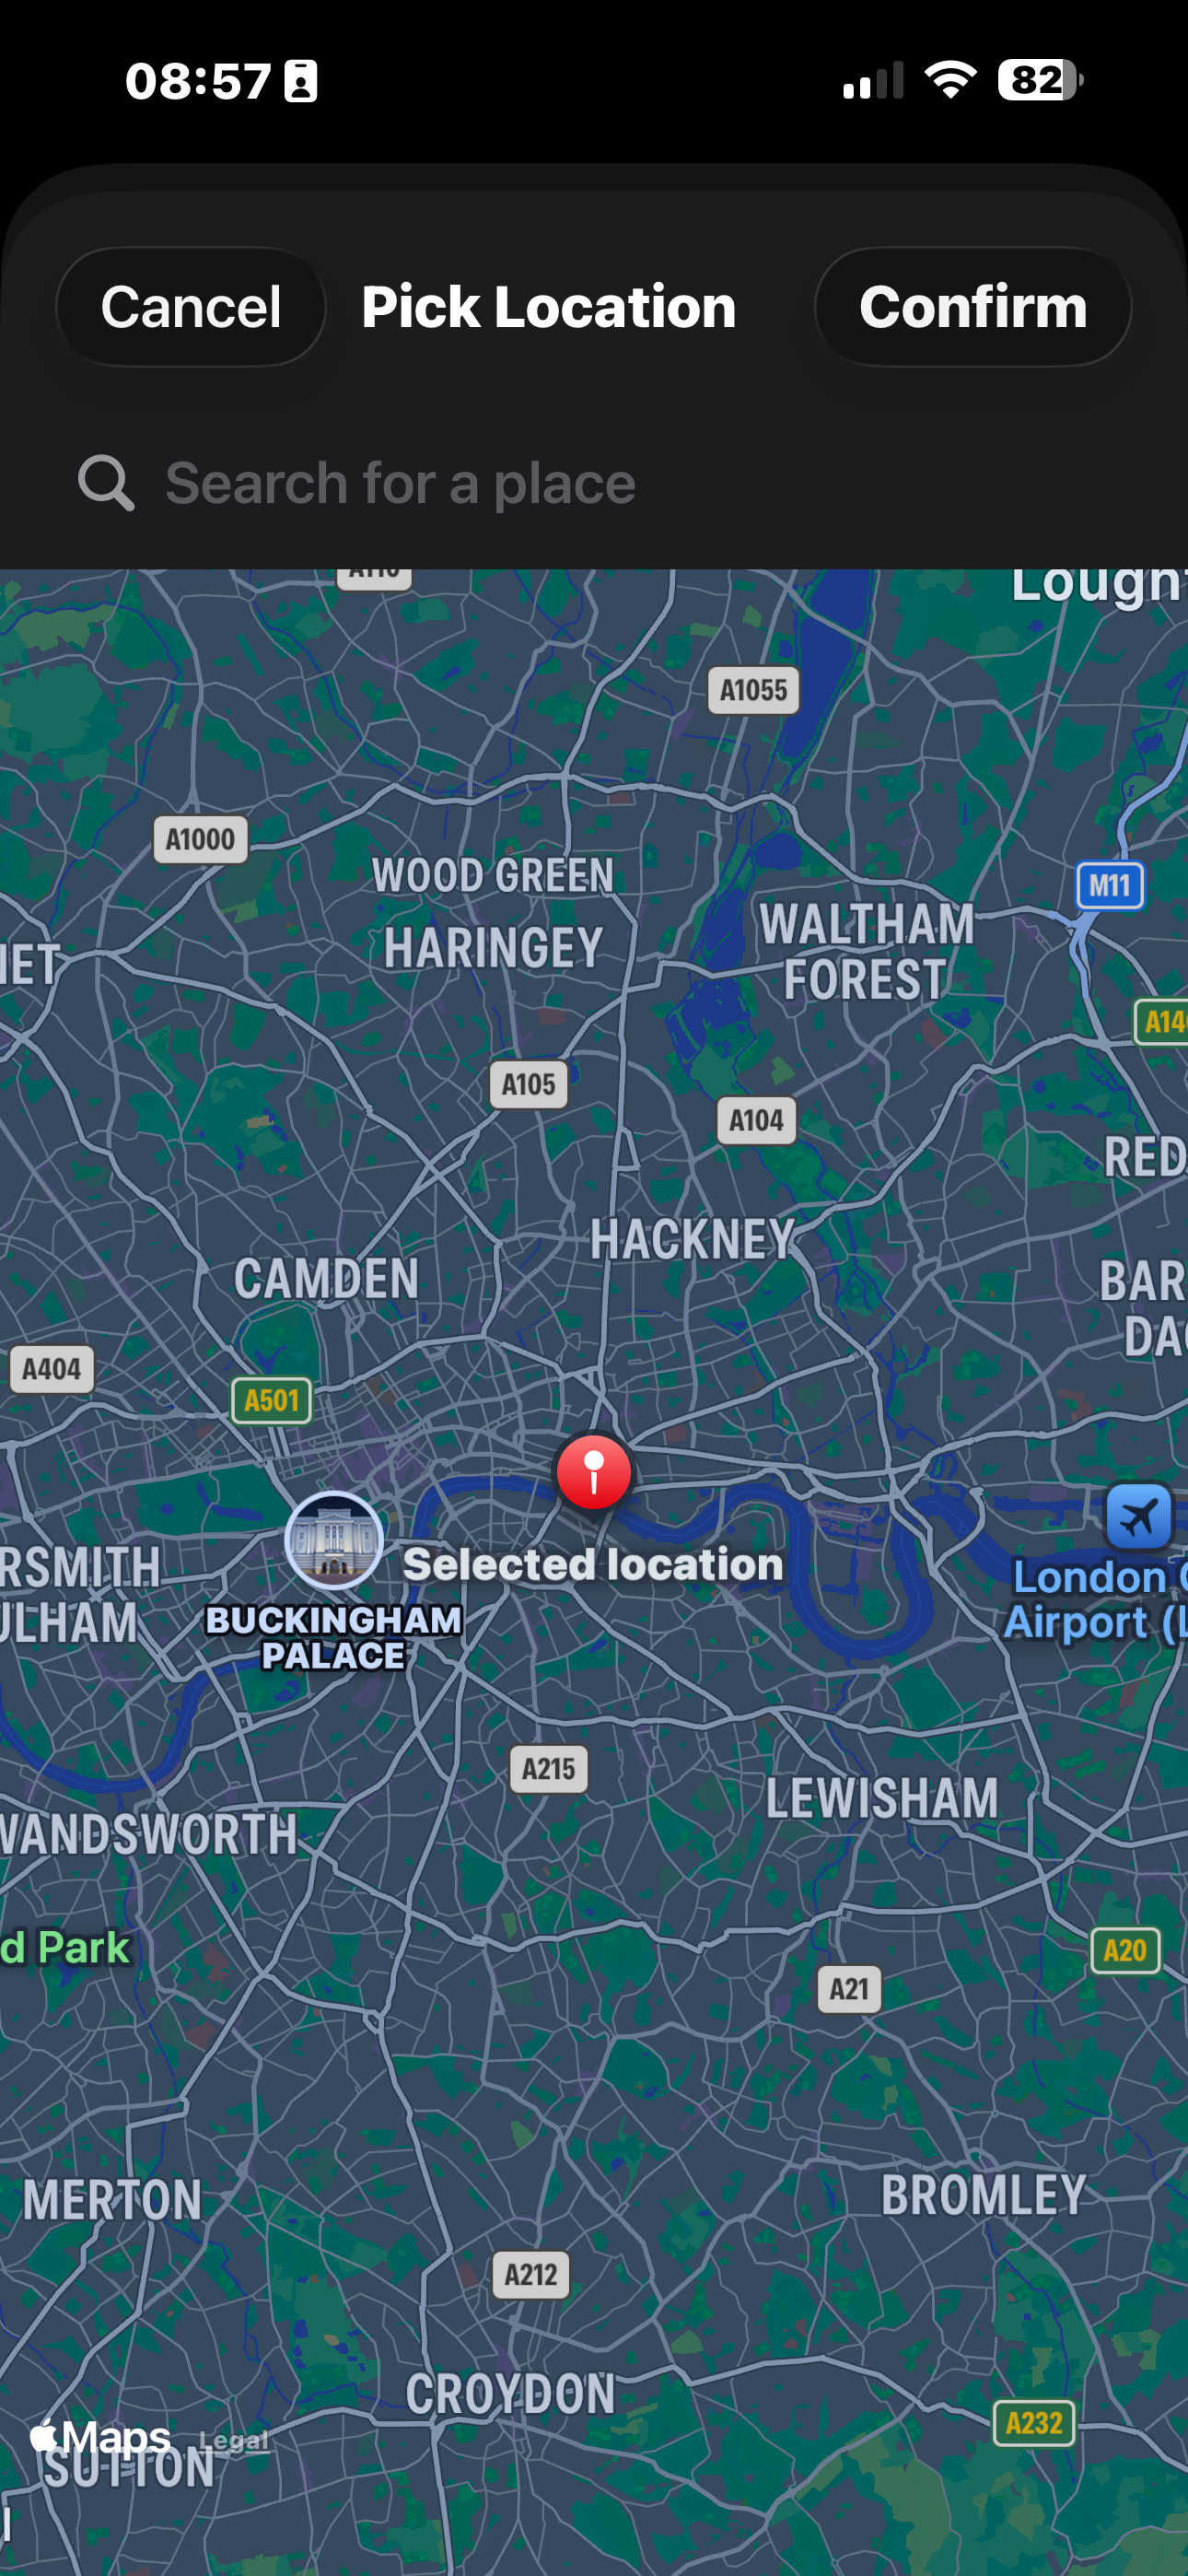
- Tap "Pick on Map" to position the pin at your home address, or type a place name in the search bar
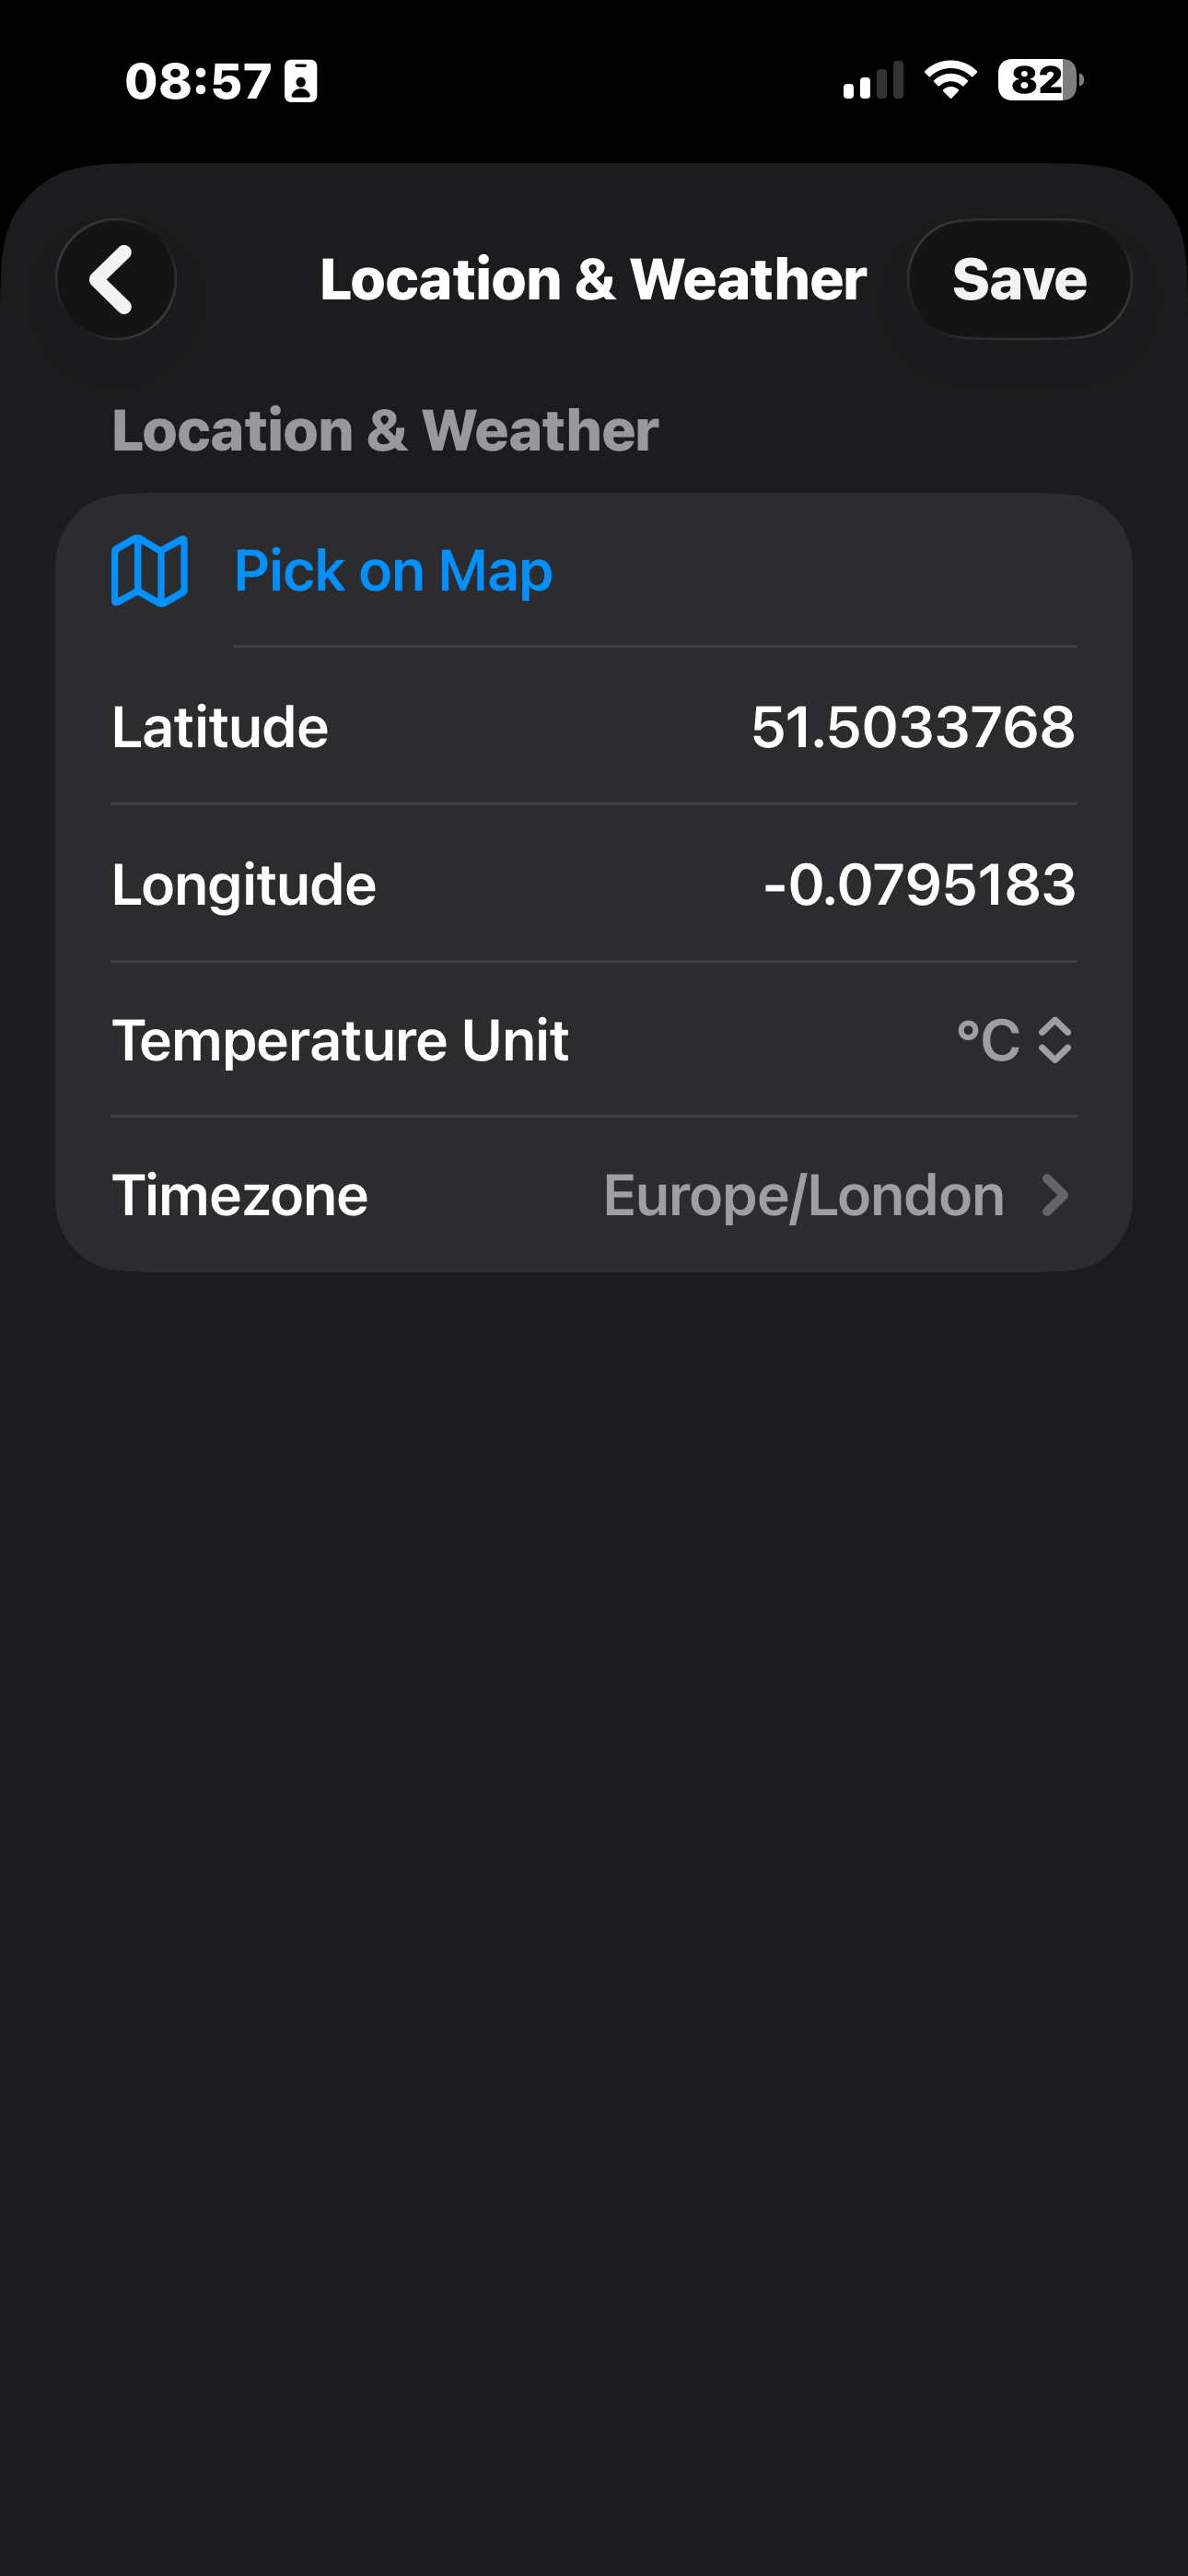
- Confirm and your coordinates are filled in automatically
- Alternatively, enter latitude and longitude manually if you know them
- Set your temperature unit (°C or °F) and confirm your local timezone
- Location is used for weather forecasts and solar irradiance calculations only. It is never shared.
Solar Arrays
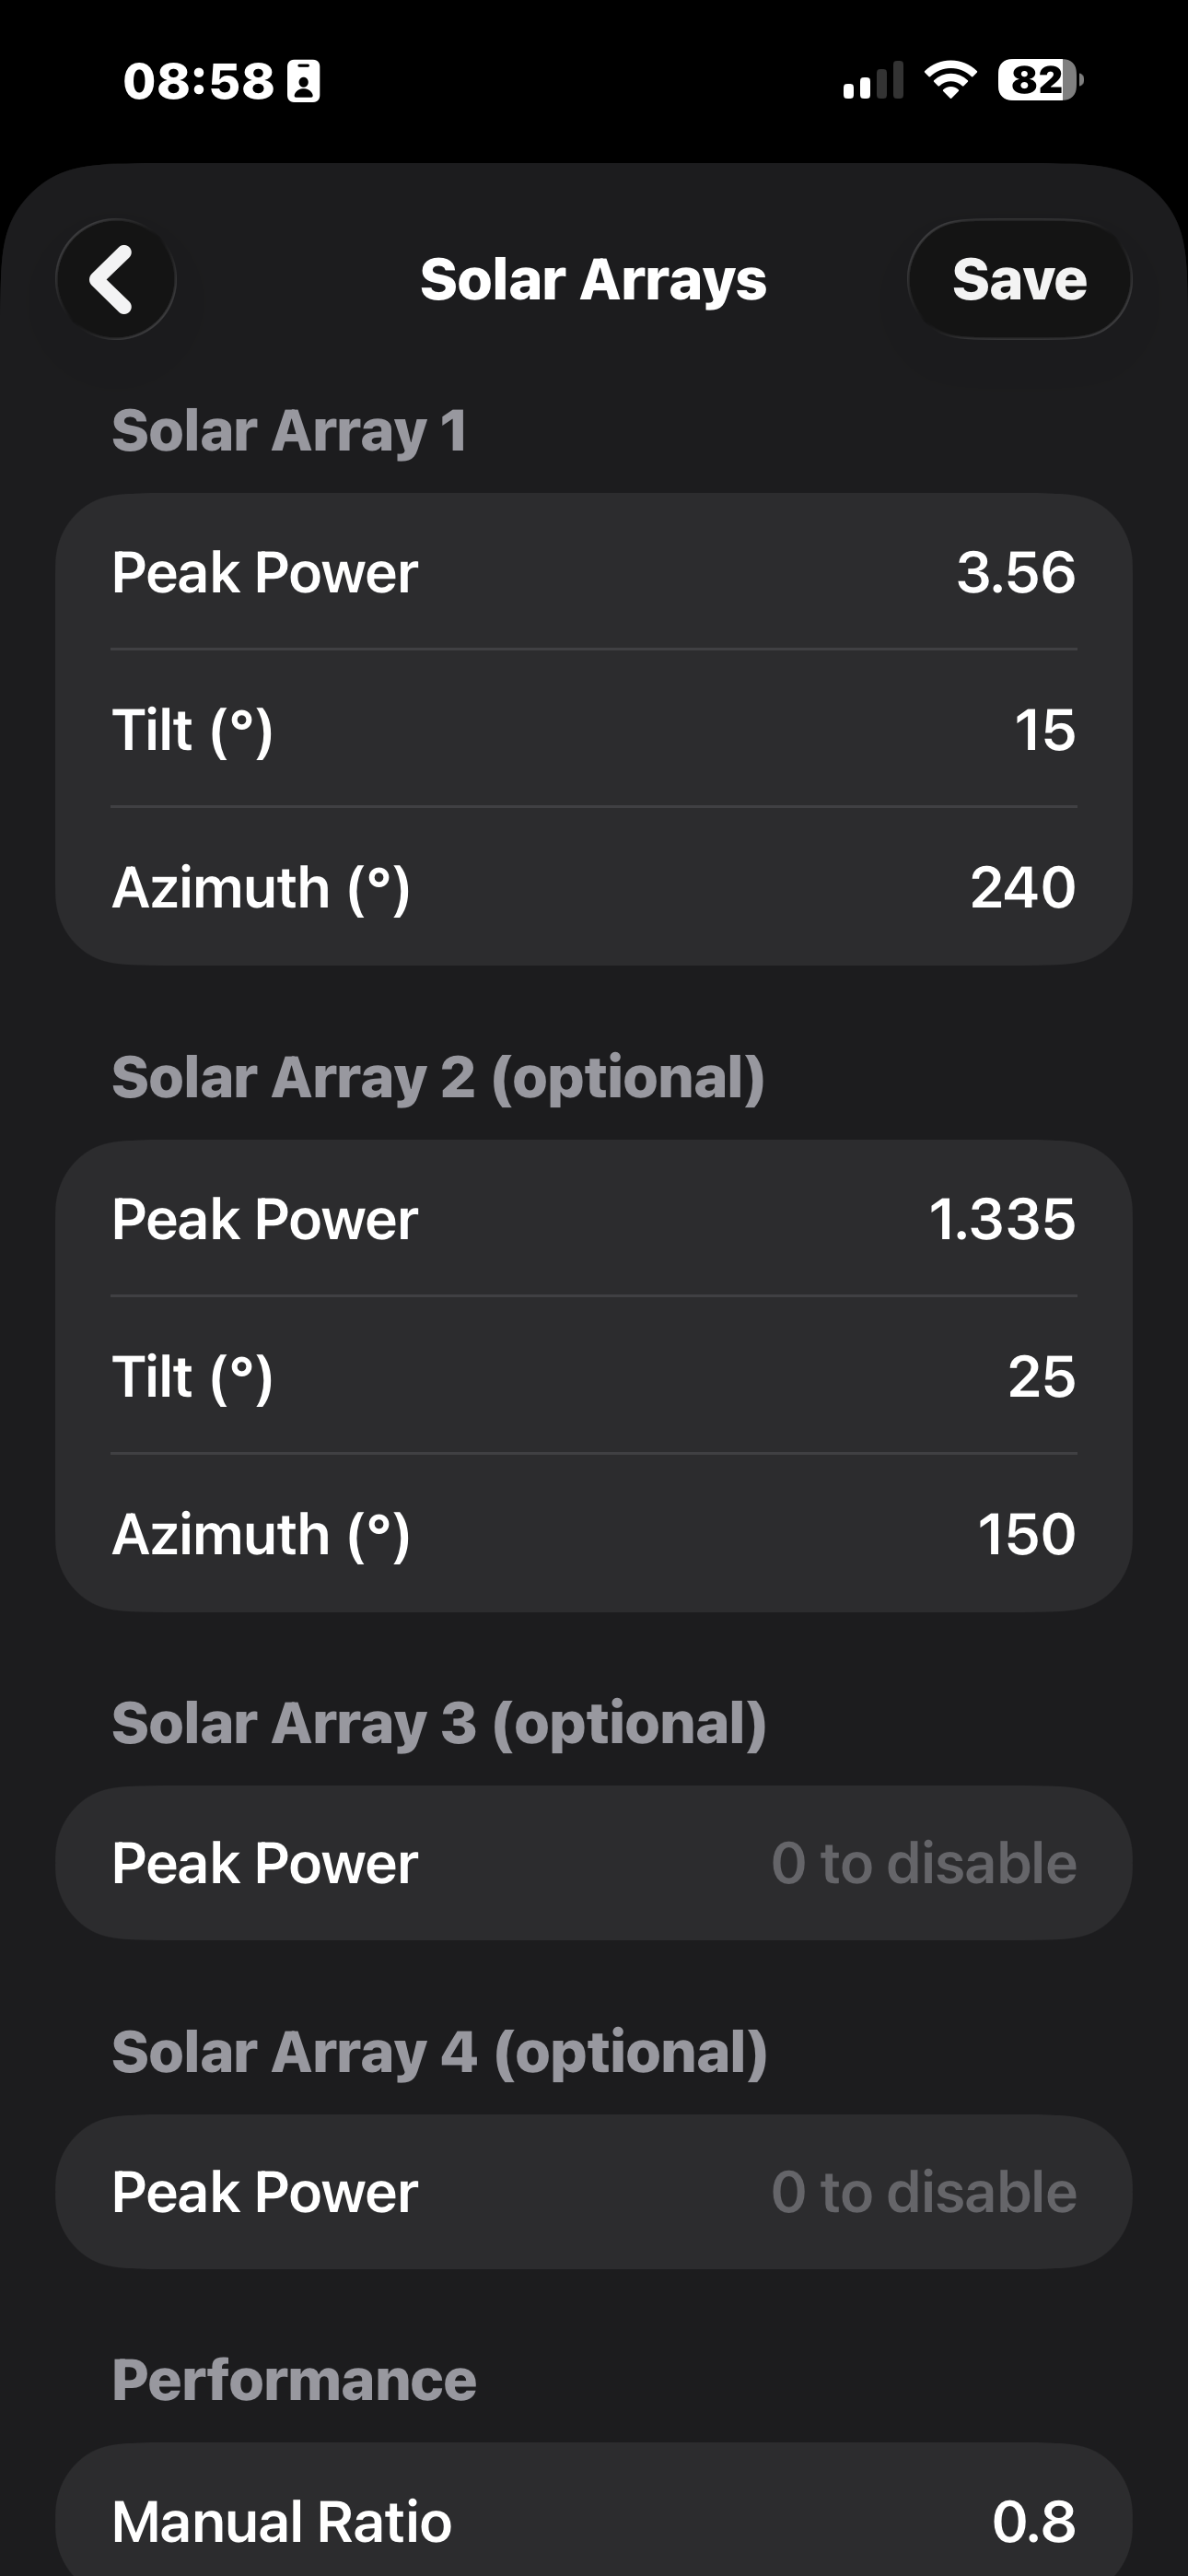
- Enter Peak Power (kWp), Tilt (degrees from horizontal), and Azimuth (compass bearing) for each of your arrays
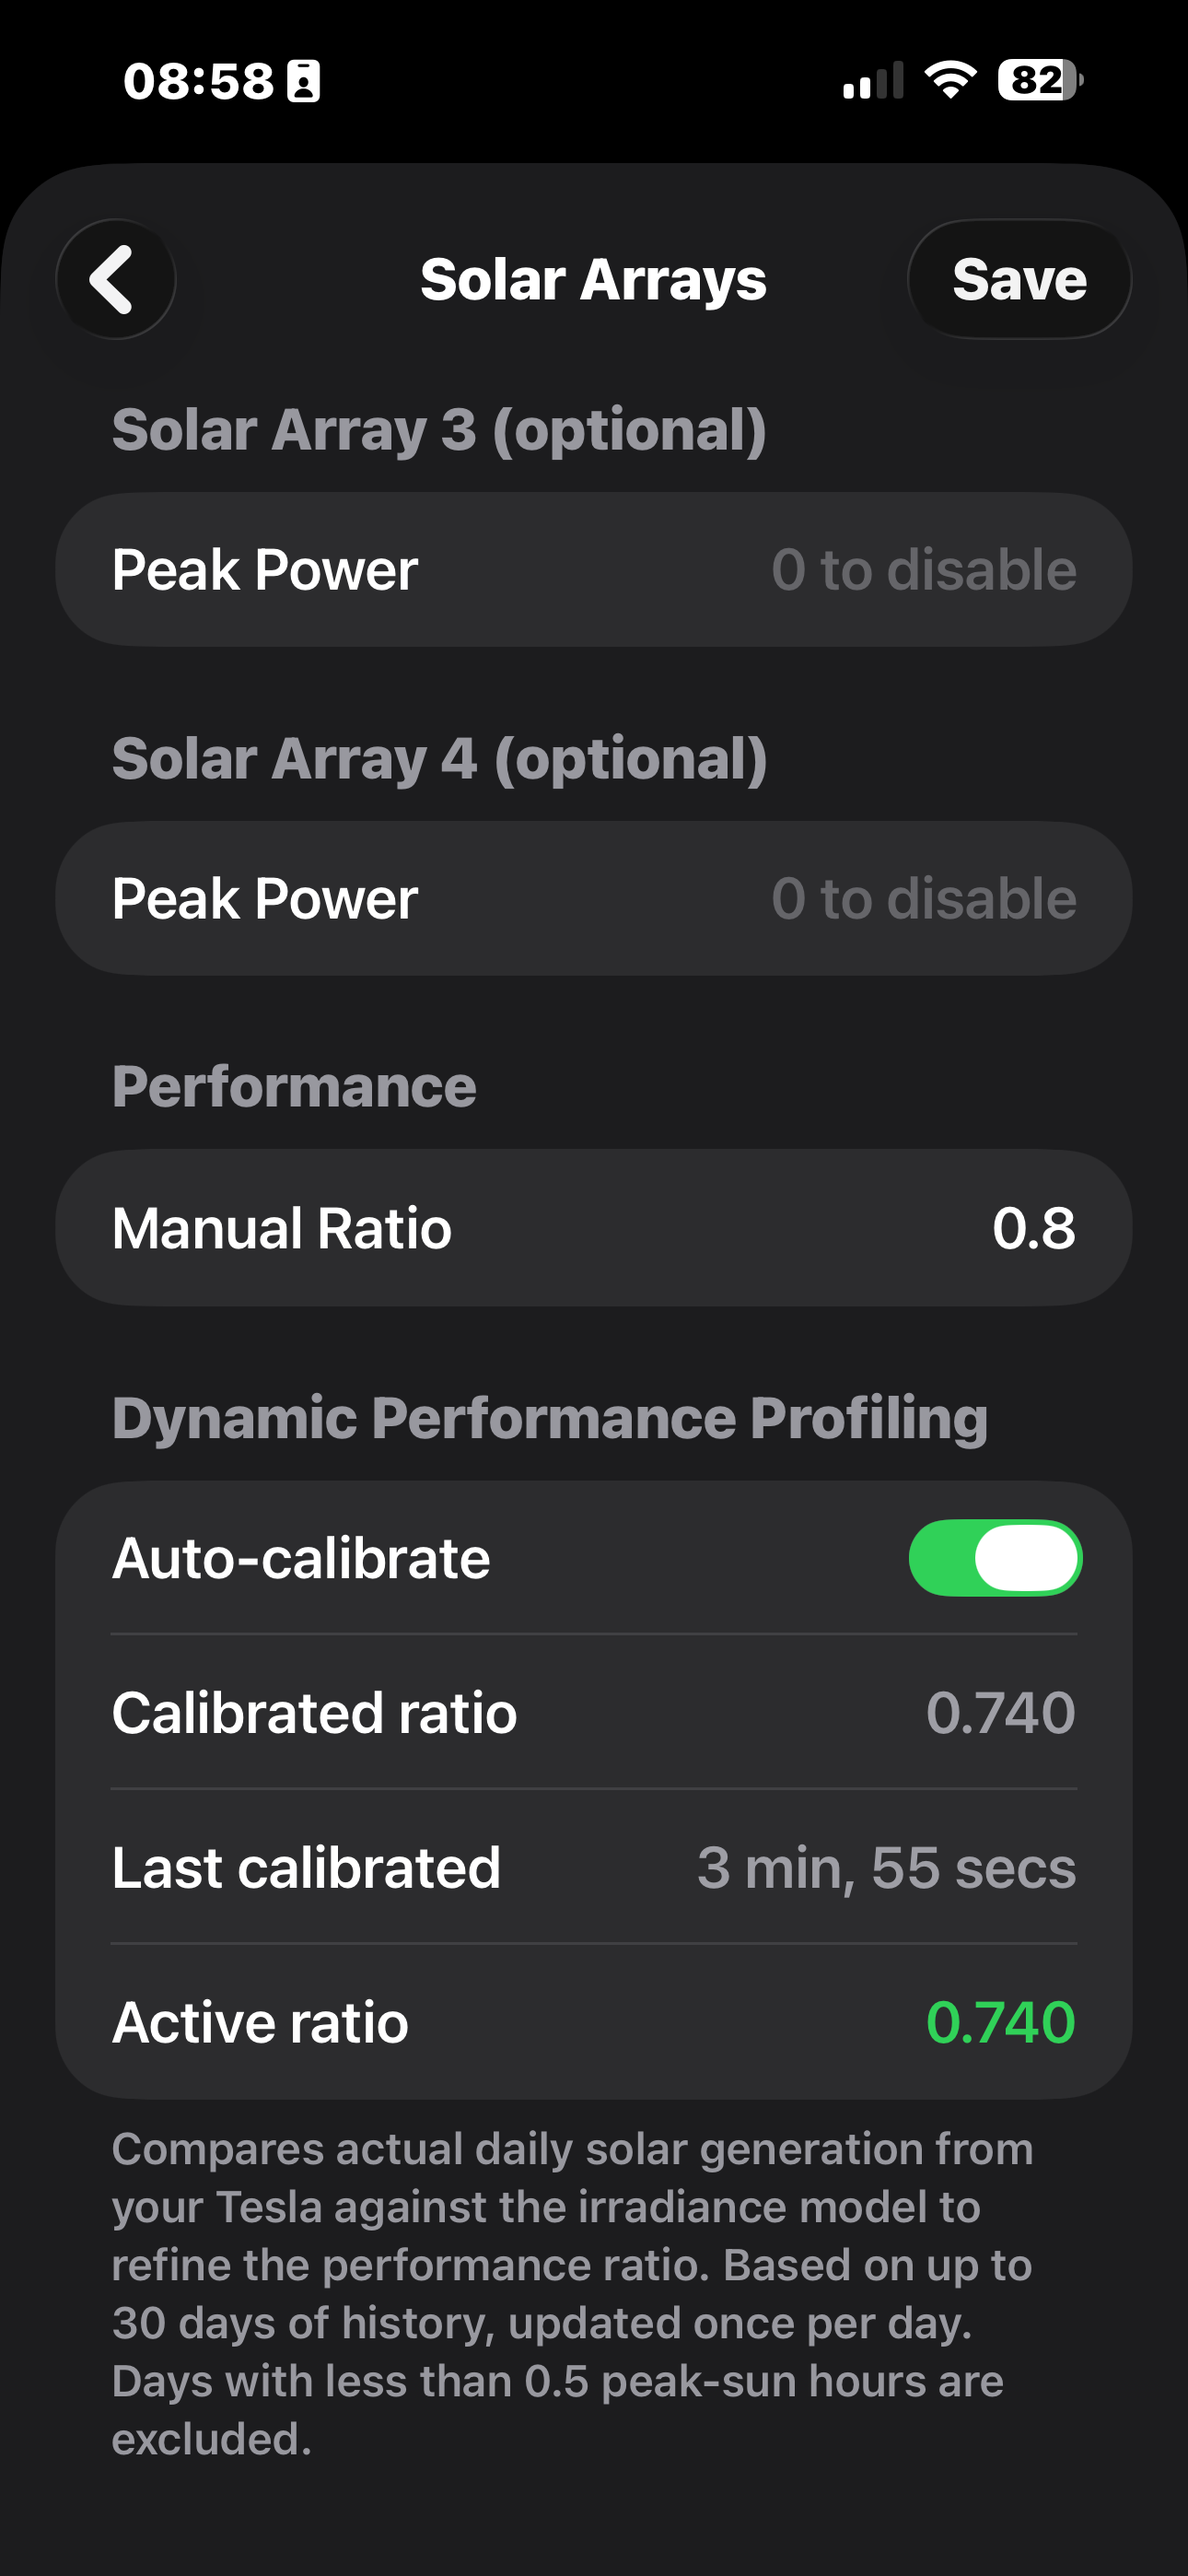
- Up to four arrays are supported. Set Peak Power to 0 to disable unused arrays.
- Azimuth is a compass bearing: 0 = North, 90 = East, 180 = South, 270 = West
- Auto-calibrate compares your actual daily generation from Tesla against the irradiance model and adjusts the performance ratio automatically, using up to 30 days of history
- The active ratio is shown once calibration completes. You can also set a manual ratio if you prefer.
Tariffs (Premium)
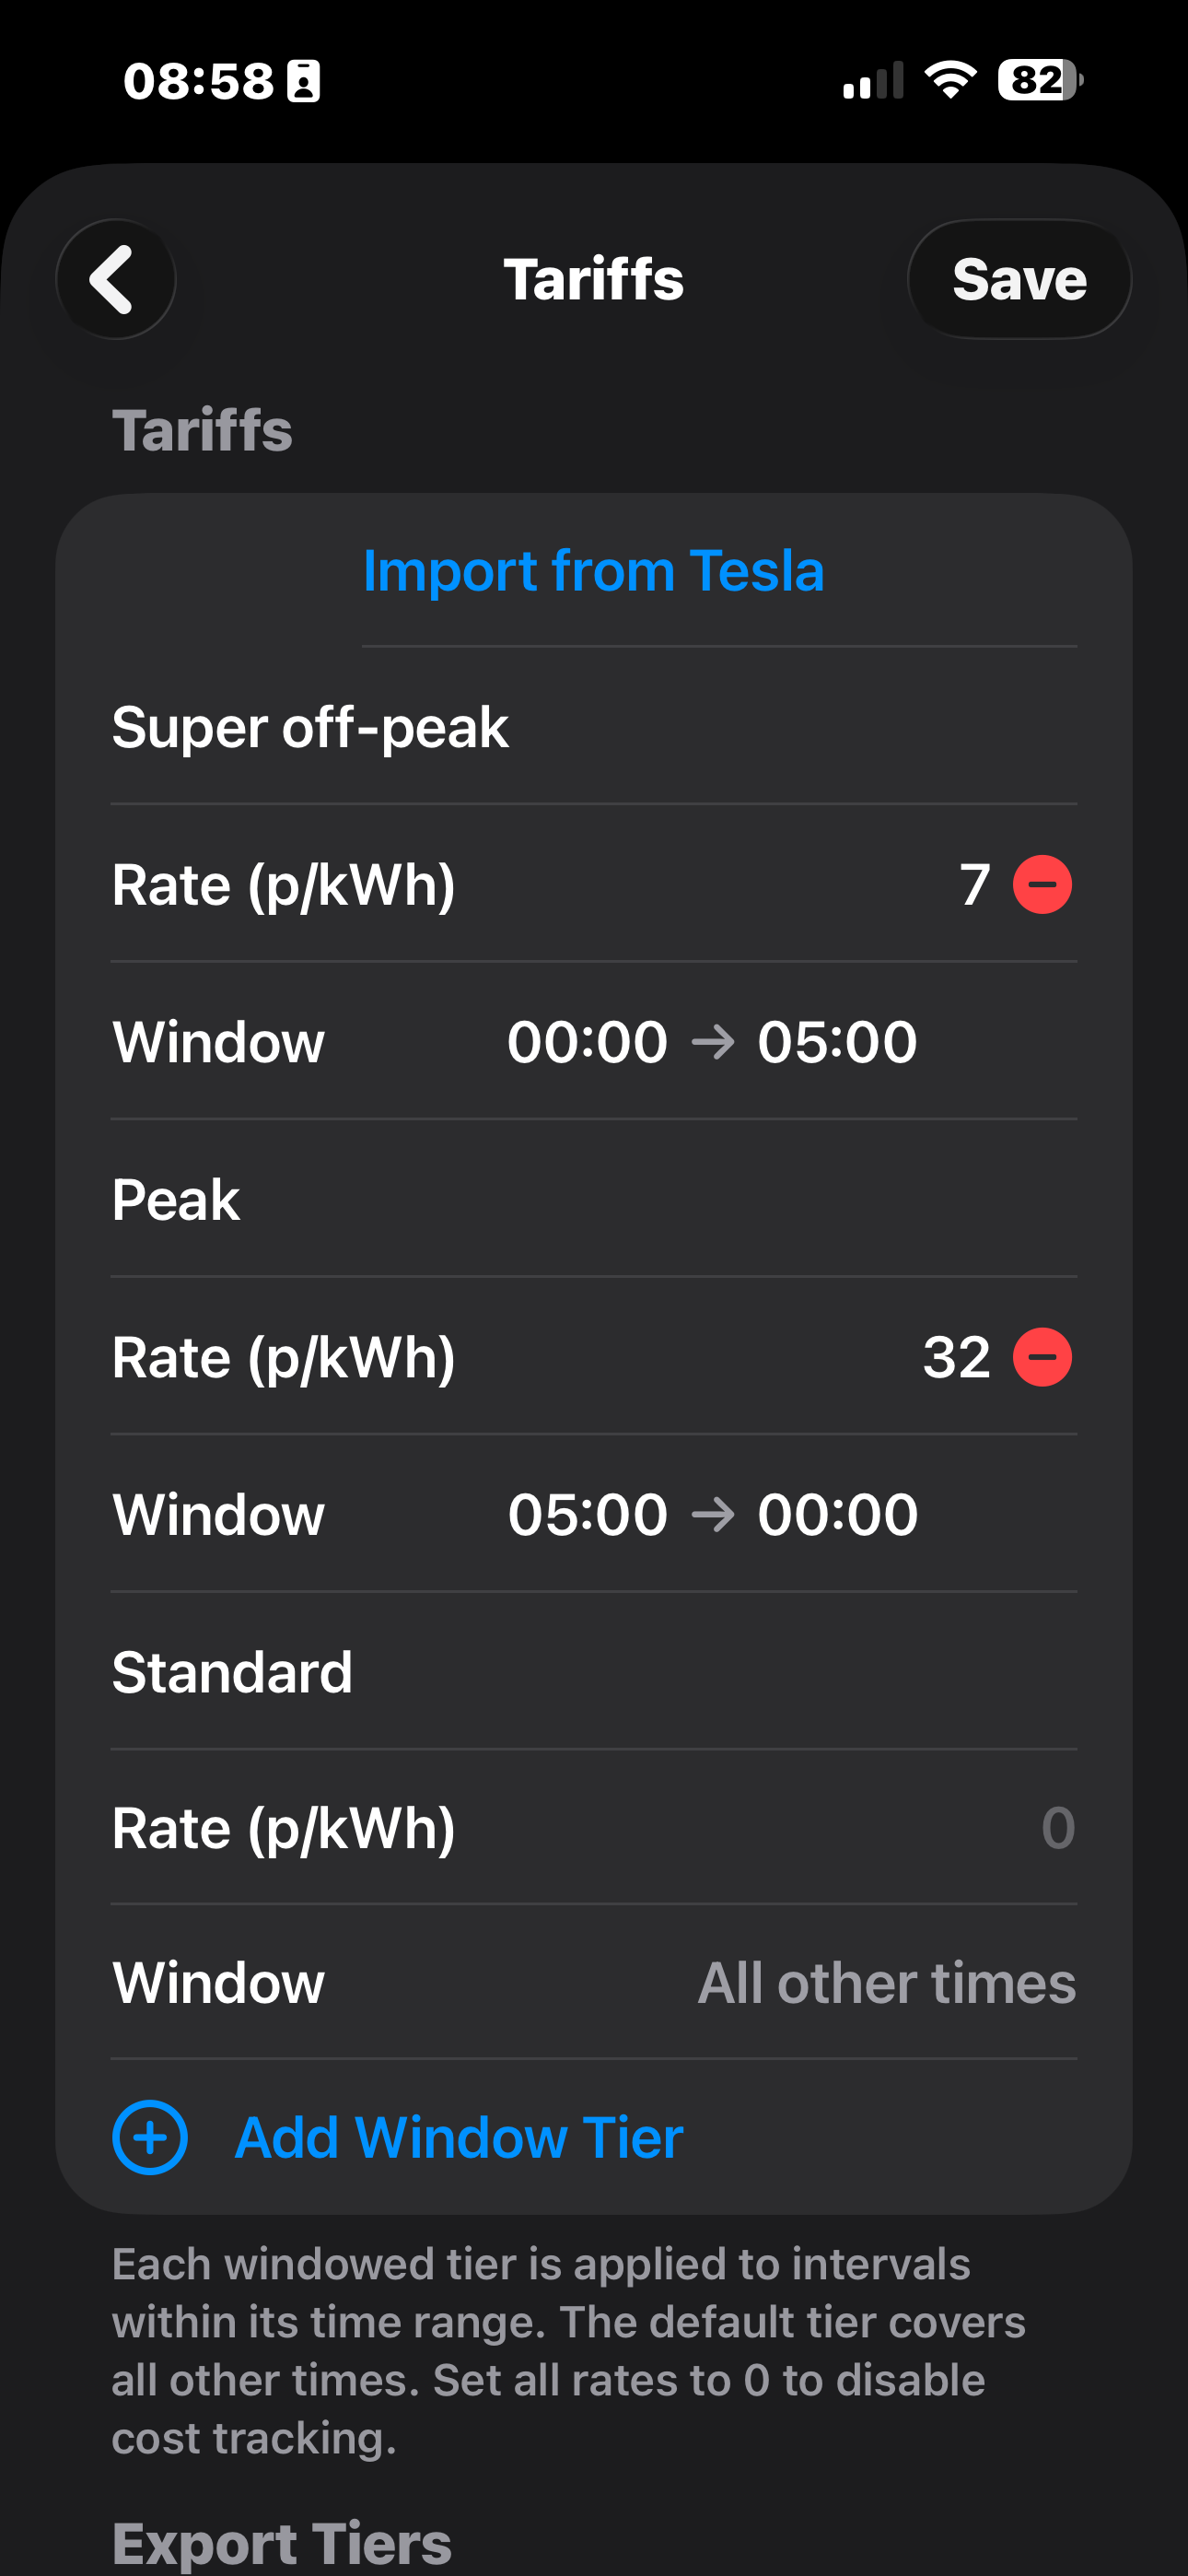
- Tap "Import from Tesla" to pull your configured rates directly from your Tesla account
- Add time-of-use windows for import pricing: for example super off-peak (midnight to 5am at a lower rate) and peak
- The Standard tier covers all times not matched by a windowed tier. Set all rates to 0 to disable cost tracking.
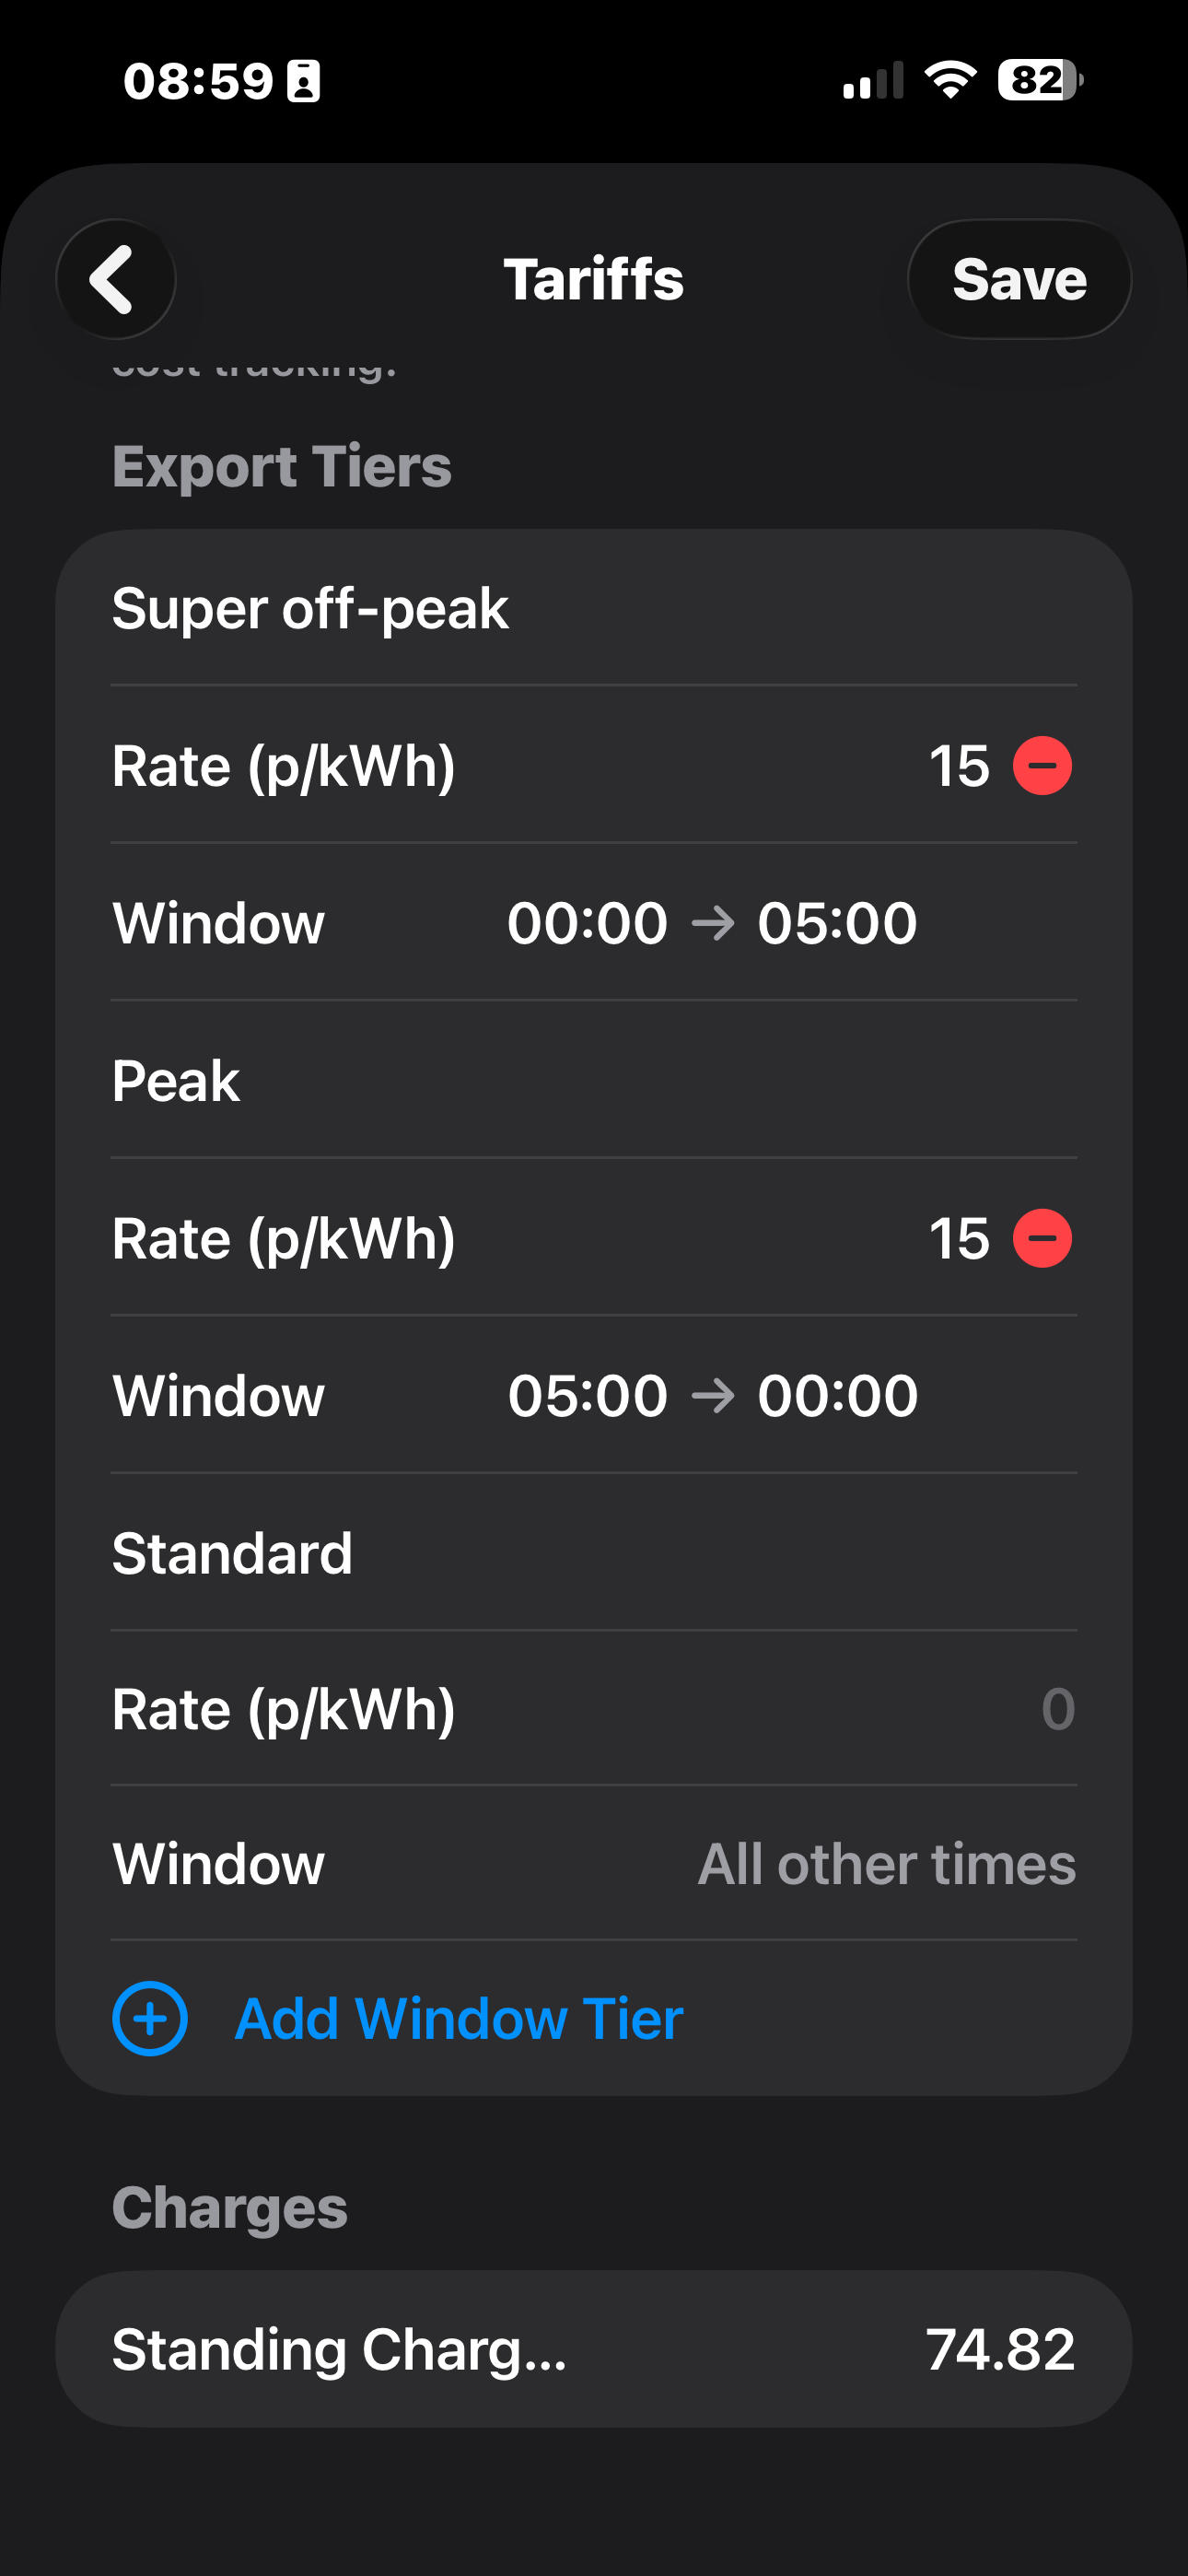
- Set export rates to track earnings when your solar surplus is sent to the grid
- Add your daily standing charge to include it in the net cost calculation
Octopus Agile (Premium)
- From the main Settings screen, tap through to the Octopus Energy screen
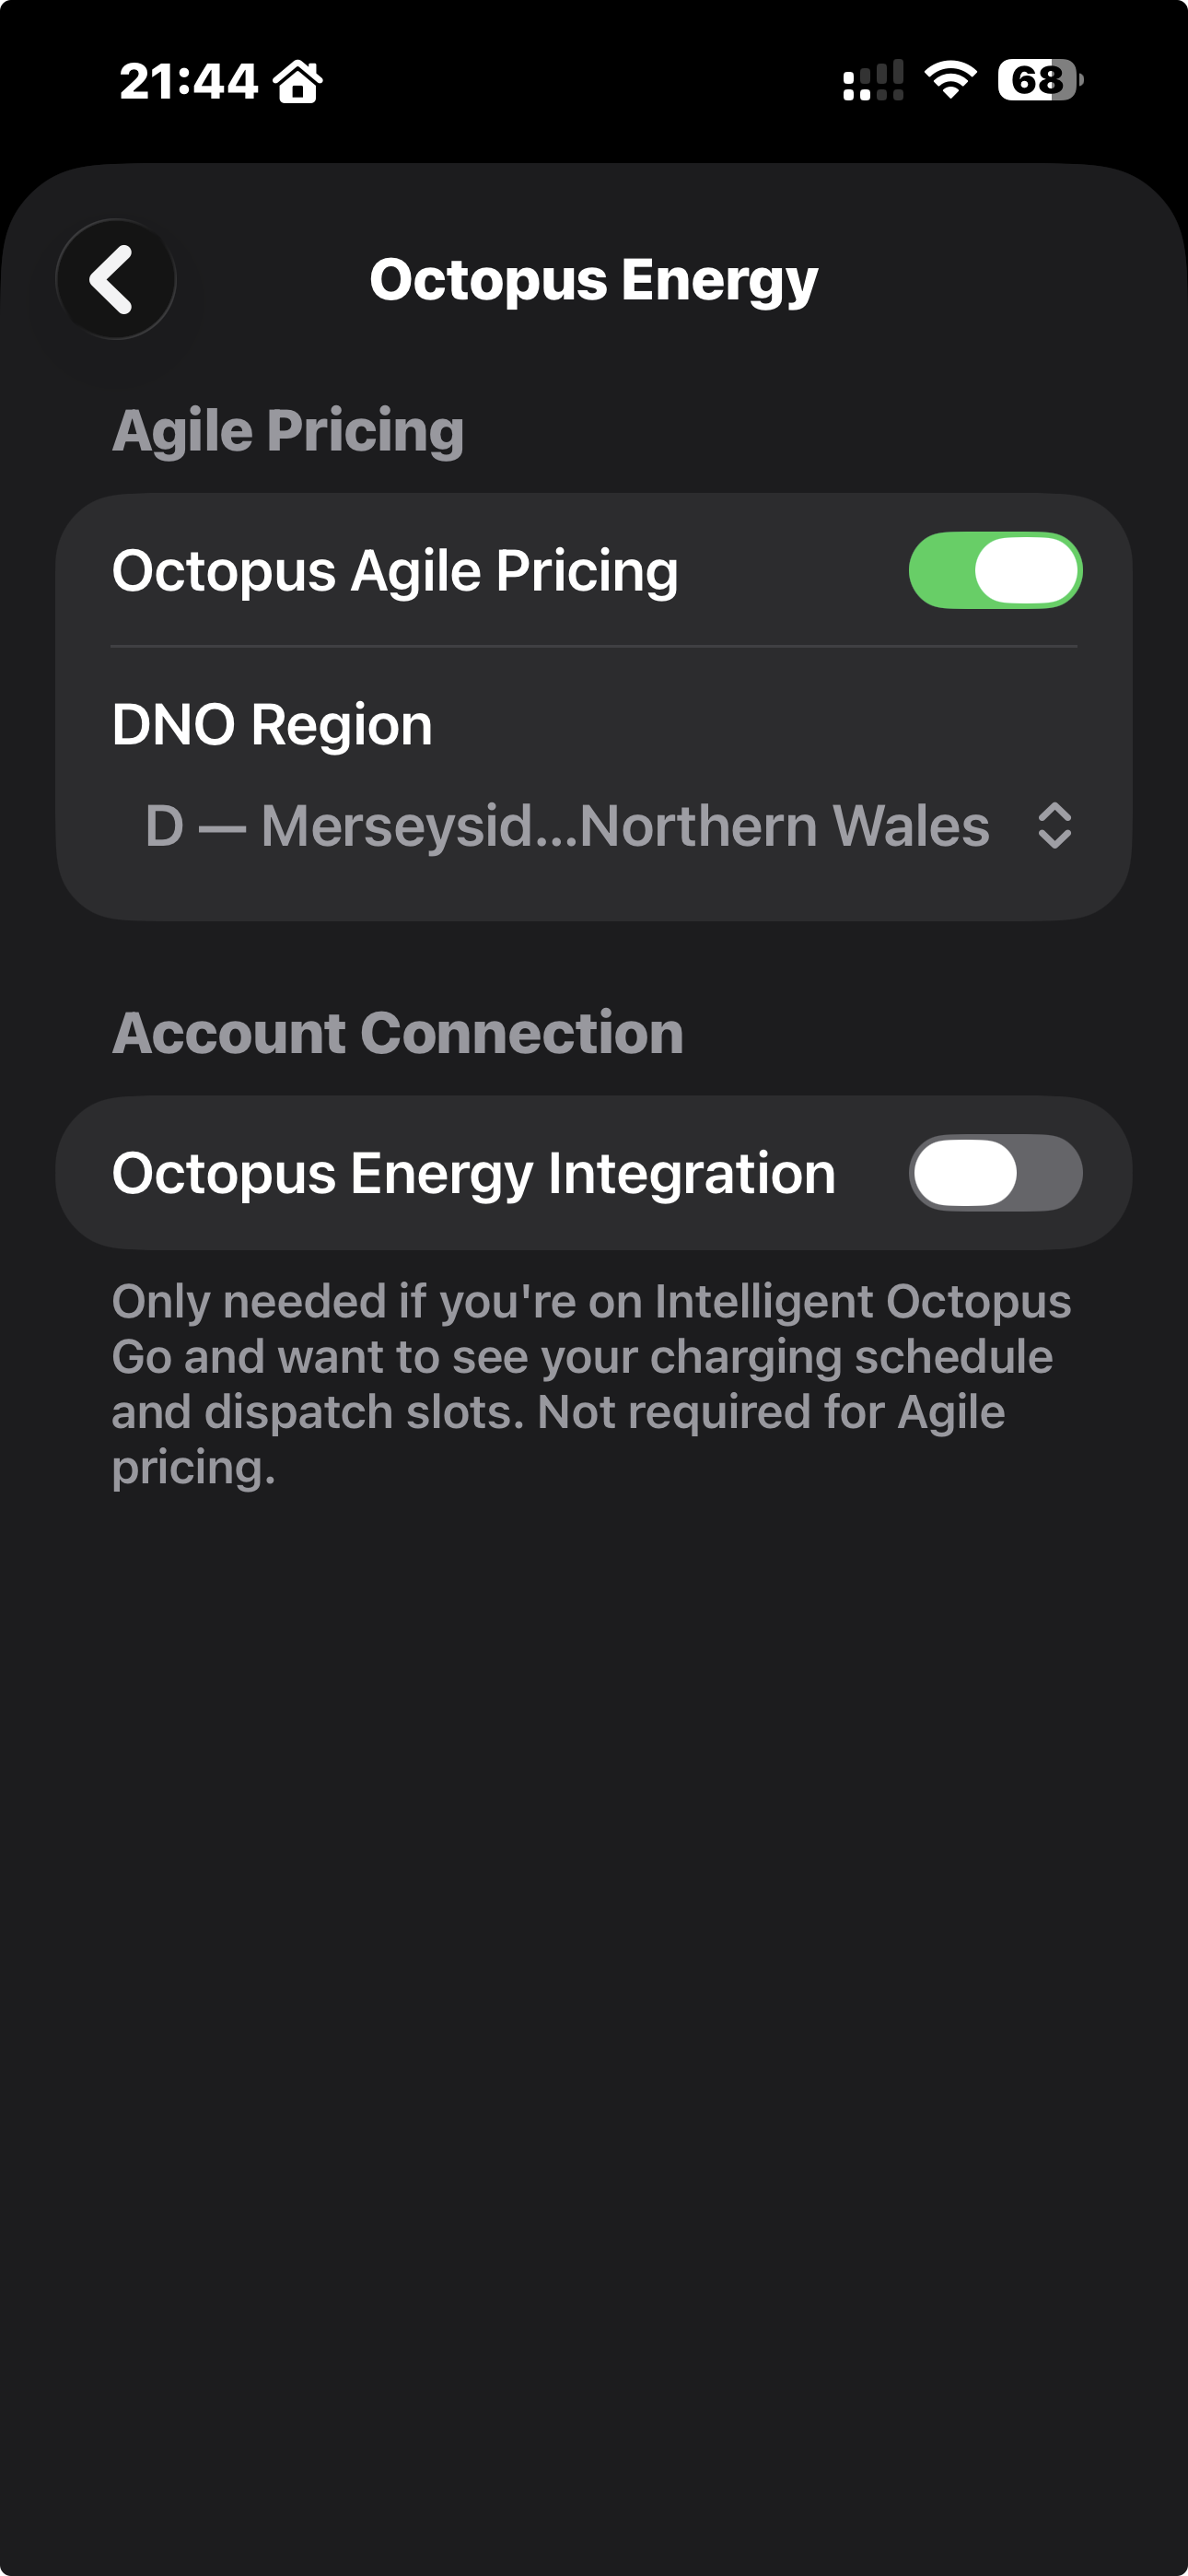
- Under Agile Pricing, toggle on Octopus Agile Pricing to enable live half-hourly rate tracking
- Select your DNO Region from the picker: this determines which regional Agile rates are fetched
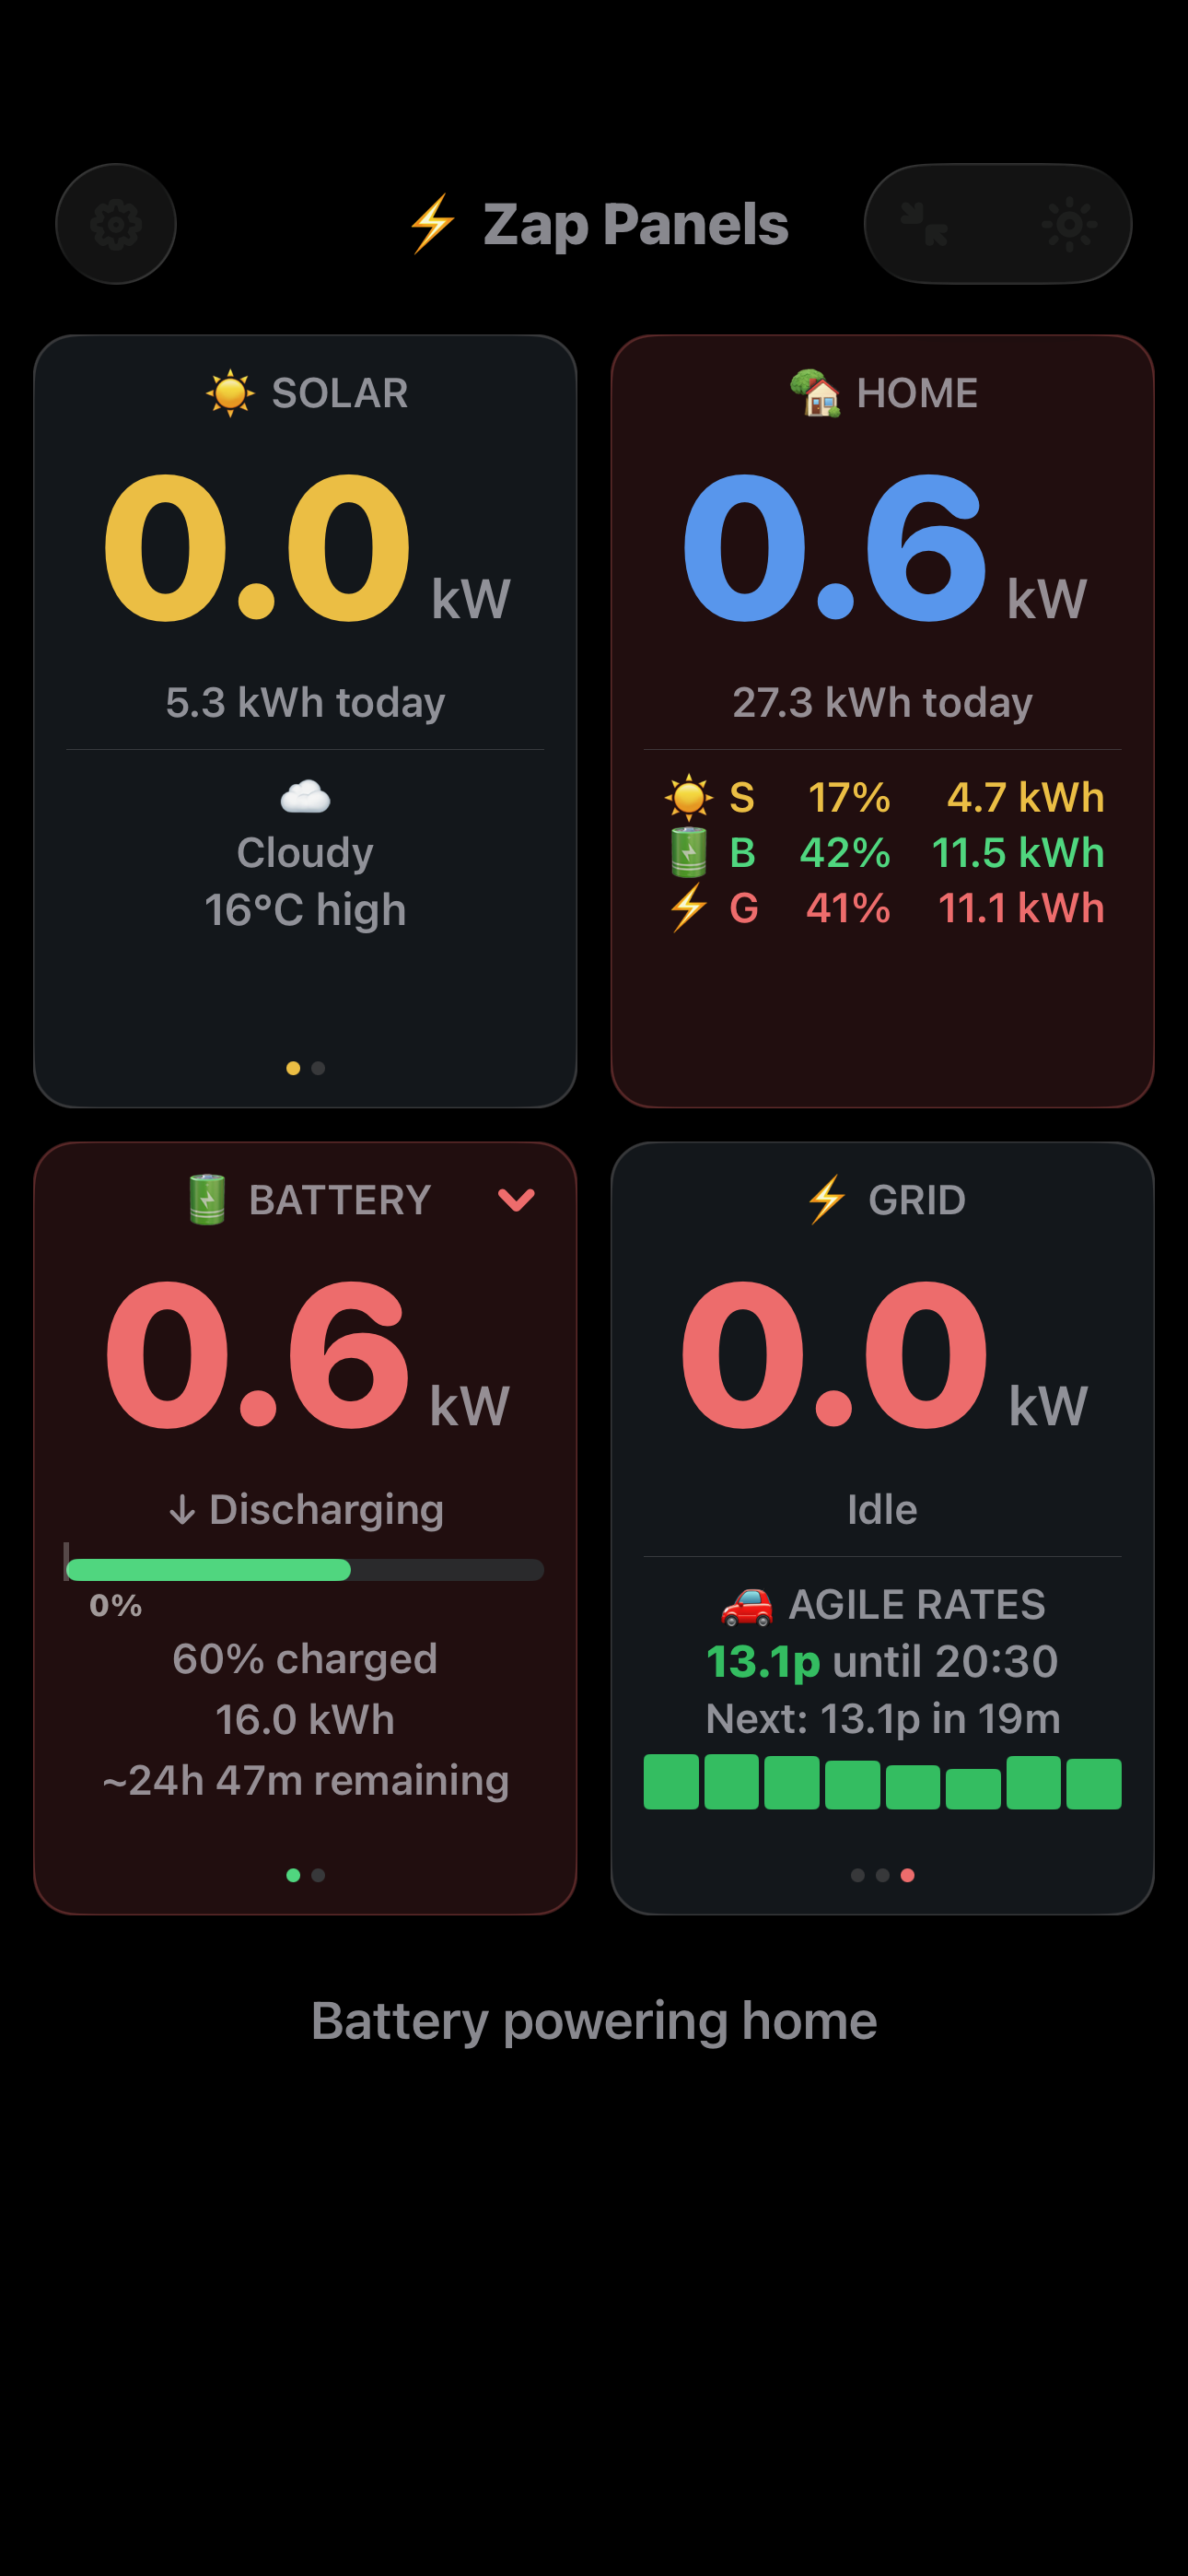
- When enabled, the Grid panel on the dashboard shows the current rate in pence per kWh, how long until it changes, and the rate for the next slot
- A row of bars beneath the rate gives a quick view of how prices move over the coming hours, so you can plan when to charge your battery or shift usage to cheaper slots
Intelligent Octopus Go (Premium)
- From the main Settings screen, open the Octopus Energy screen. Agile Pricing and the Octopus Energy Integration are configured separately, so you can use either or both
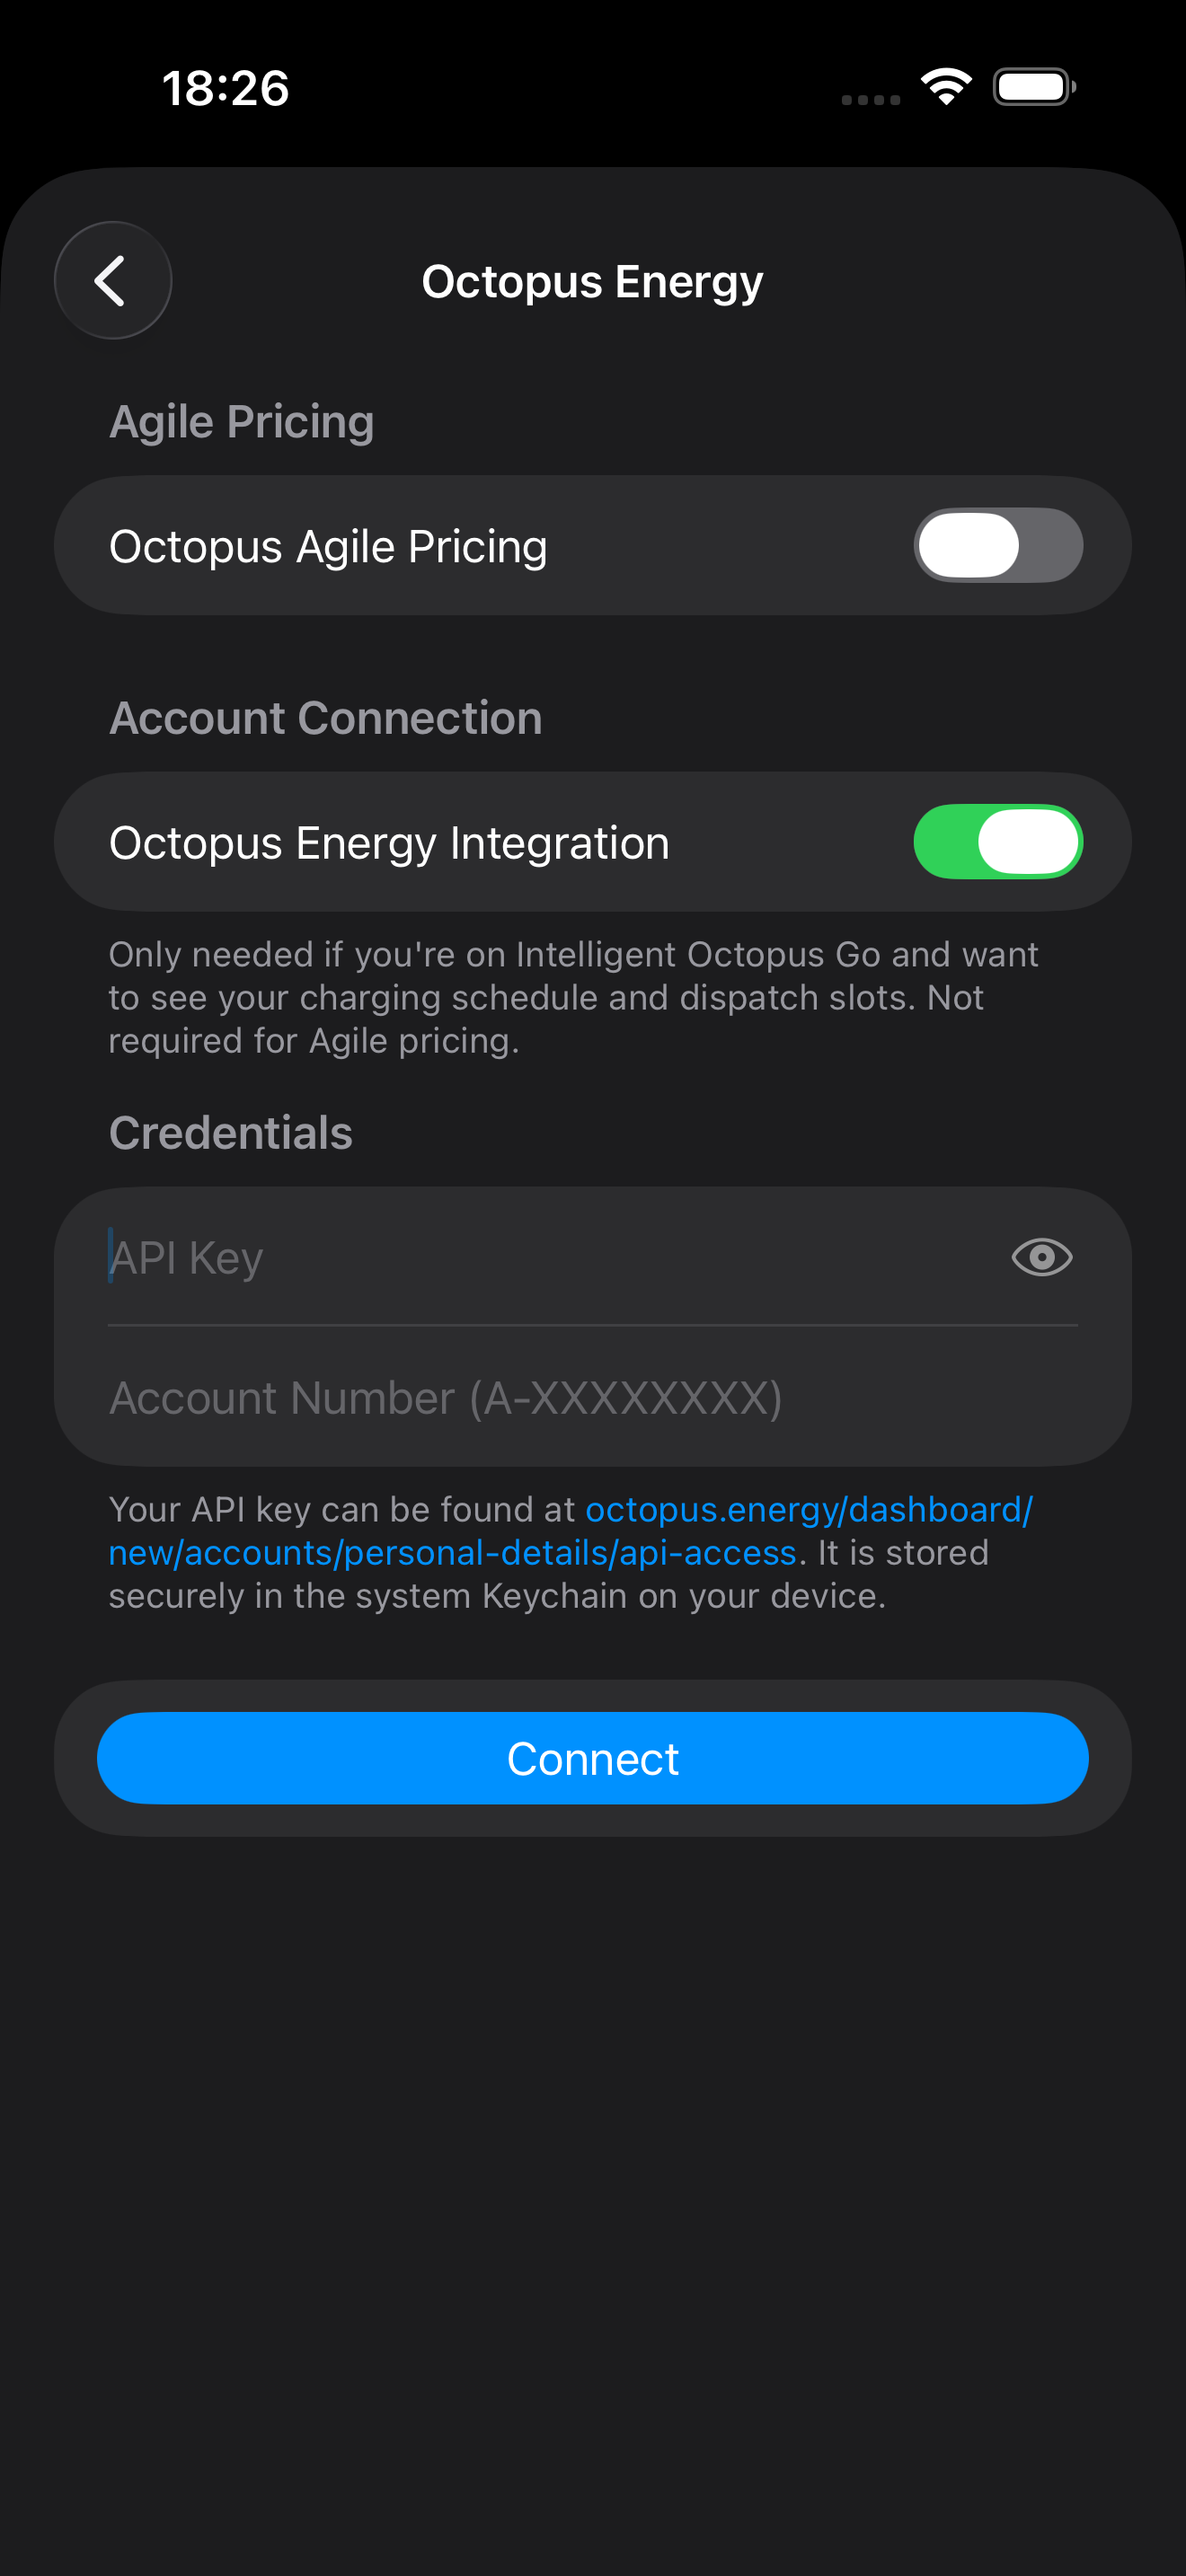
- Under Account Connection, toggle on Octopus Energy Integration. This is only needed if you are on Intelligent Octopus Go and want to see your smart charging schedule and dispatch slots. It is not required for Agile pricing
- Enter your API Key and Account Number (A-XXXXXXXX) under Credentials
- Find your API key at octopus.energy/dashboard/new/accounts/personal-details/api-access. It is stored securely in the system Keychain on your device and never leaves it
- Tap Connect to link your account
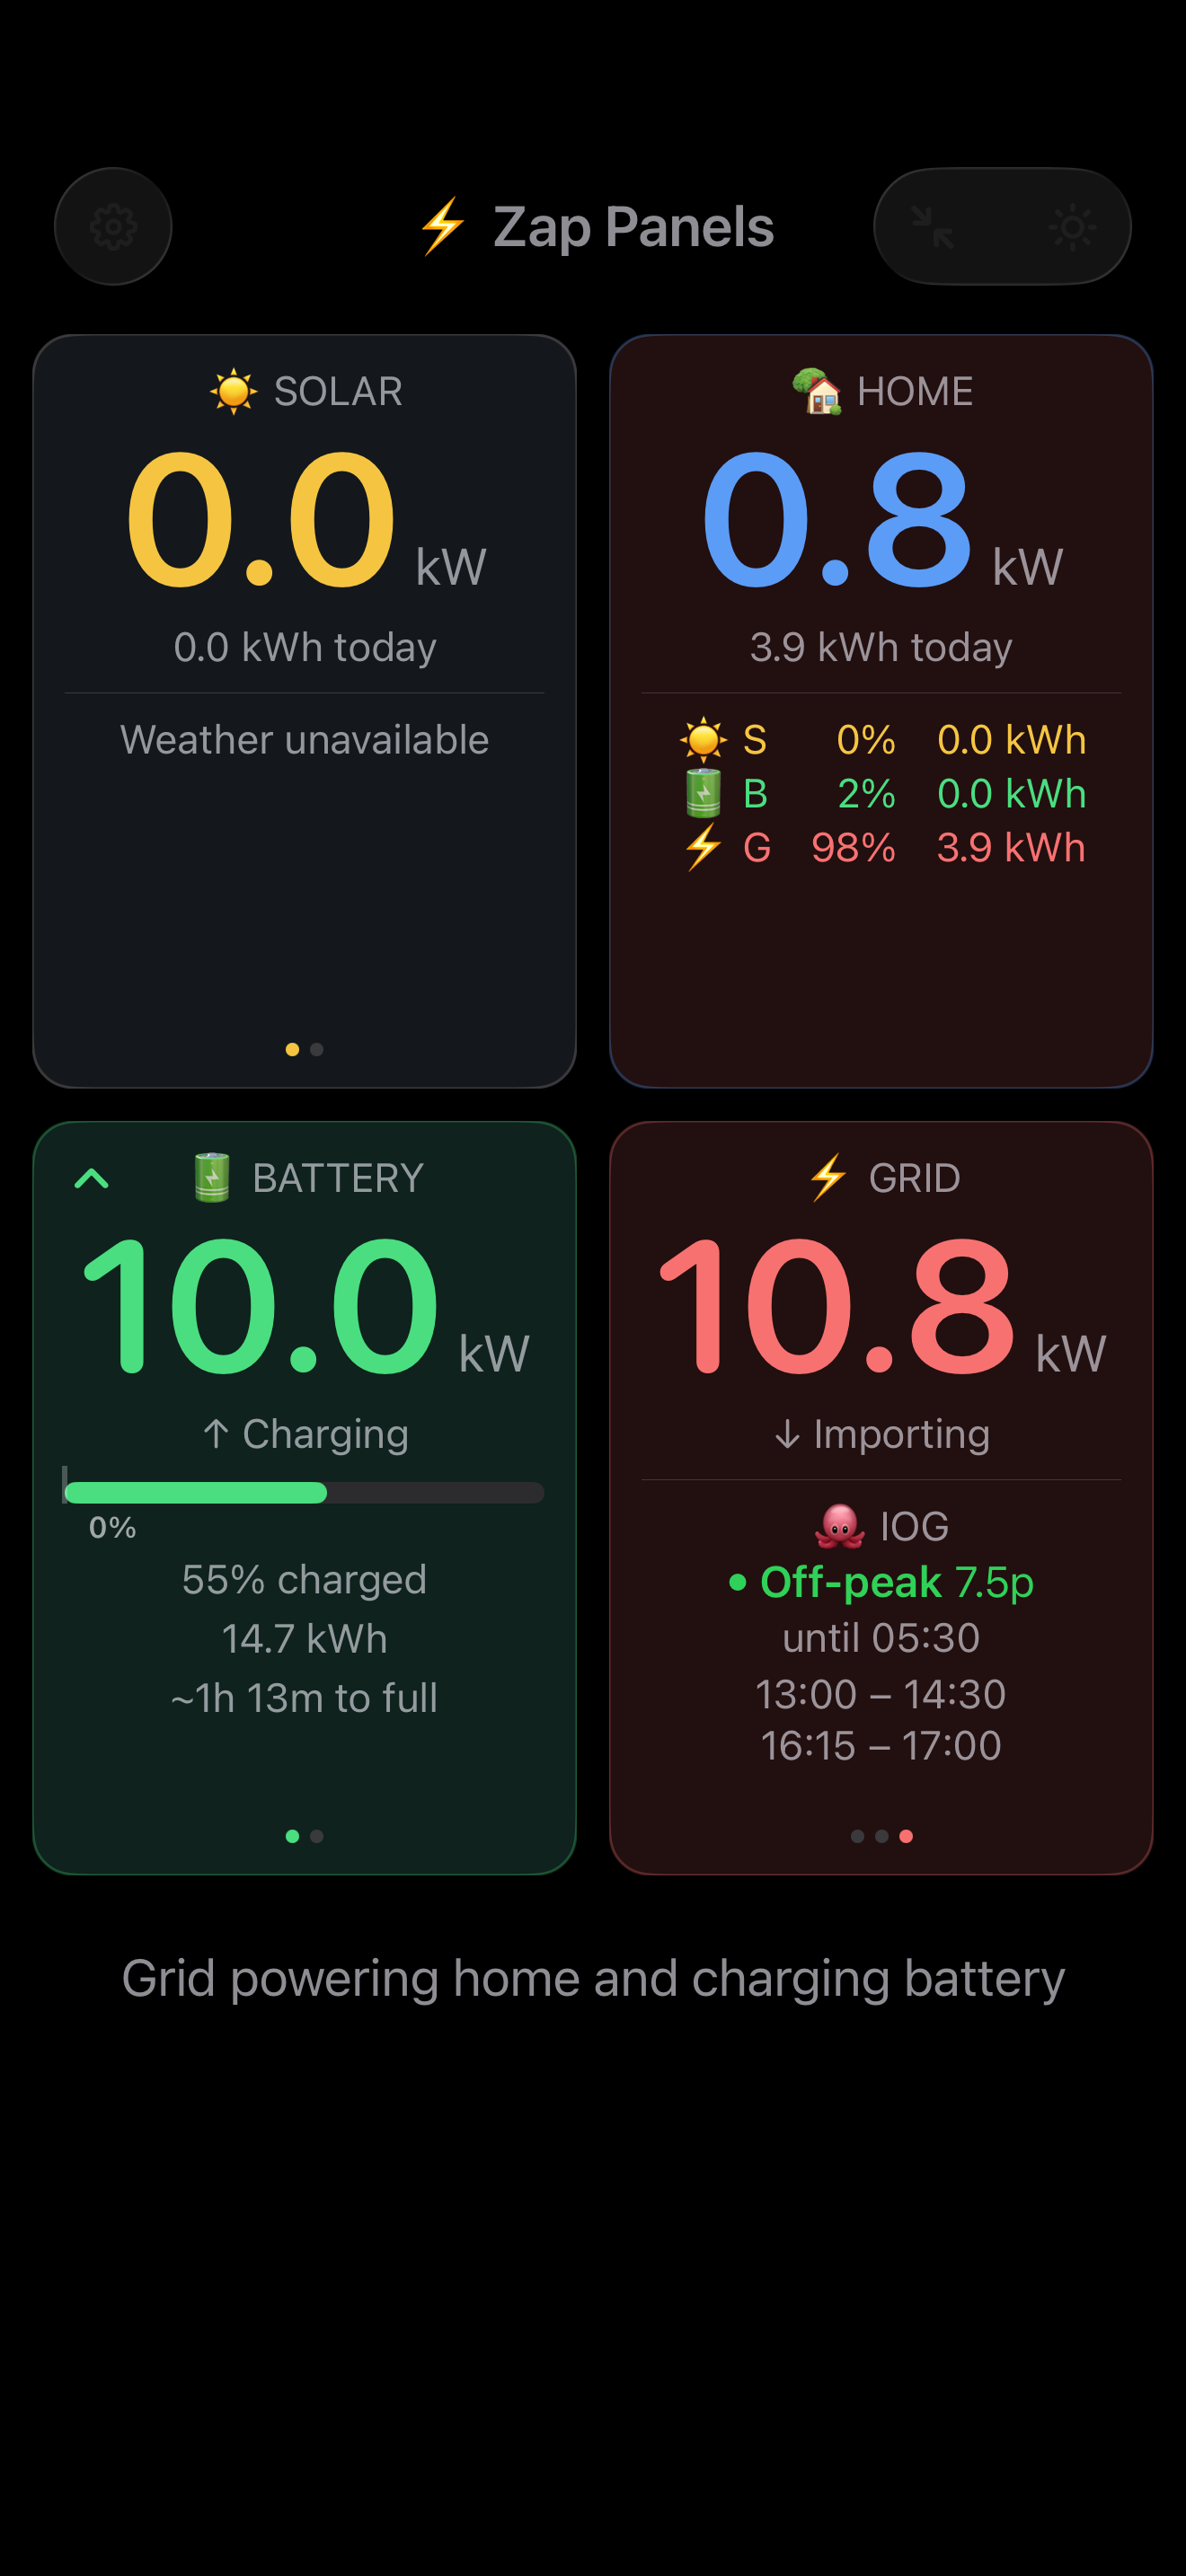
- Once connected, the Grid panel shows an IOG view with your current rate (for example Off-peak 7.5p) and how long it lasts, plus any upcoming planned dispatch slots when Octopus schedules extra off-peak charging